Purpose
Pre-Requisites
- A VM with Windows 2008 R2 SP1 installed in it.
- For database I have taken MSSQL Server Express 2012.
- A domain account [email protected] with local administrator rights.
Enable "Log on as a Batch Job"
- Type in secpol.msc /s at Start ->Run
- Select "Local Policies" in MSC snap in
- Select "User Rights Assignment"
- Right click on "Log on as batch job" and select Properties
- Click "Add User or Group", and include the relevant user (in my case vradmin)
This will set the proper rights. There is another step we need to set but I will talk about it shortly.
Also, before we start the installation we need to install the vRA Management agent in the IaaS server so that vRA Appliance will be able to able to detect the IaaS server. The installer is available at https://vra.lab.com/installer page. The package name is vCAC-IaaSManagementAgent-Setup.msi.
Pre- requisite for this package installation is .NET Framework 4.5. Once the package is downloaded in the IaaS server double click on it to start the installation.
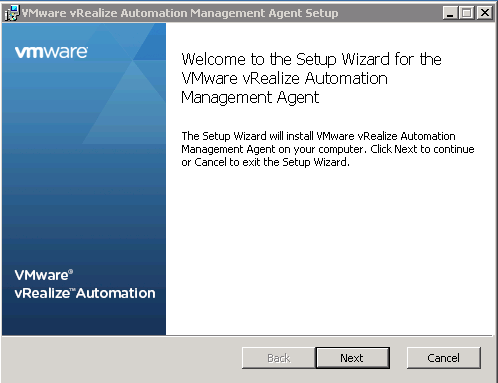
vRA Management Agent installation:
Follow the below methods to install the agent.
- After the double click once the installation window opens click next
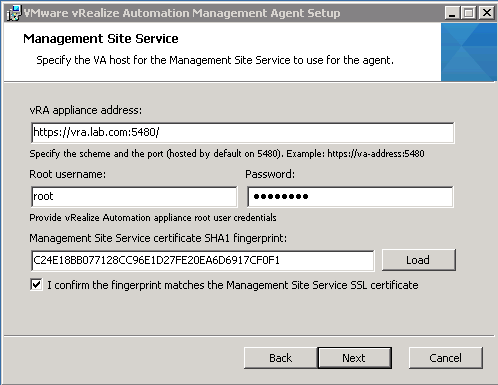
- Next provide the details of the vRA server. Note the appliance address is appended by port number 5480. Also click on Load to load the fingerprint from the vRA server and after checking it to be right click on the confirmation button. Click on next button to go to next page.
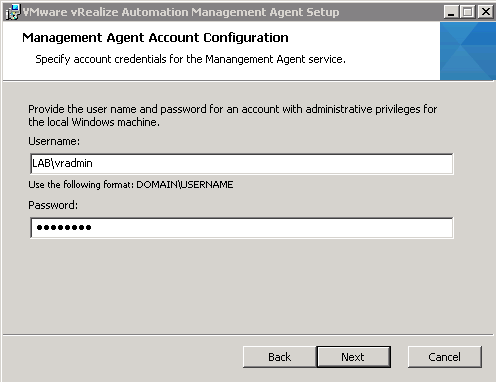
- Next provide the user id and password with local admin rights in the system. I used the account which I will use for later installations as well. Click on next.
- Next page Click on Install button to start the installation. Once done click on Finish to close the window.
- Note the agent gets installed as any other Windows application. If for some reason you want to start the reinstallation you need to manually uninstall this agent from Programs and Features Panel. Uninstalling IaaS components does not uninstall this agent.
All the above screenshots are provided below:


Ok so agent installation is done. Now we can start the configuration. As mentioned earlier, we can start the Wizard by accessing it from https://<vra appliance FQDN/IP>:5480 and logging in with root/<passwd>.
IaaS installation through Wizard
So let's start the installation. This time we will start the installation with IaaS installation option selected.
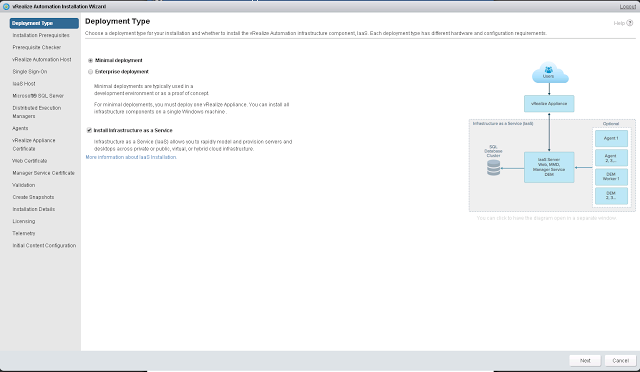
- Similar to the situation explained in Part I post, the wizard starts with the warning and then deployment selection page.
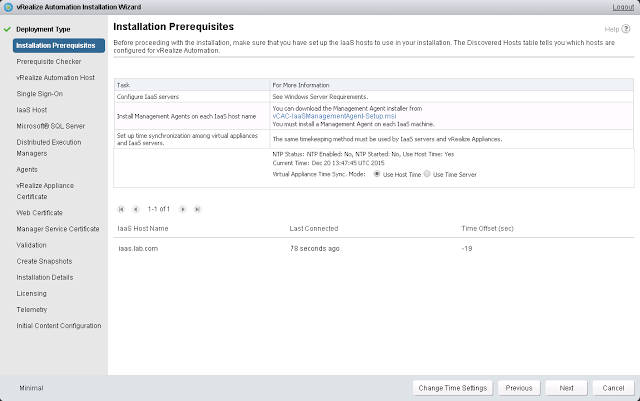
- Next page will let us download the "vRA Management Agent". So if we have not already done so, we can download this package from here and install it in IaaS server at this stage. Once installed I can see the IaaS server at the lower half of the screen. It will also show details like when was the last time it was connected and Time Drift between vRA and IaaS server. Also in this page you can change the Time setting or set the time settings. Once you complete all these setting click next.
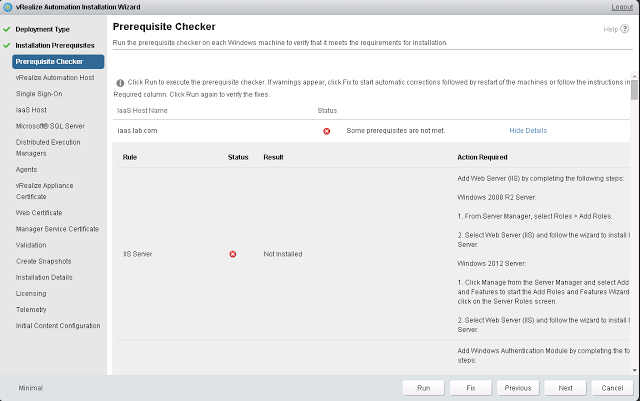
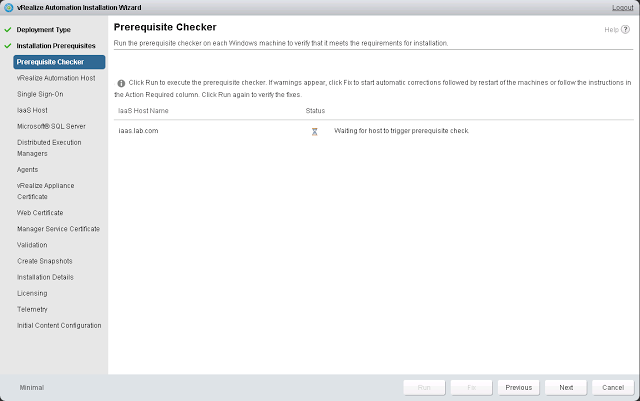
- The next step is the most important one as this step checks the "Pre-Requisites". To to start the checking click on "Run" button. Since I only installed .NET Framework 4.5, Java 1.7 and the Management Agent and did not do any further configuration. So for obvious reason the test fails. You will get details of which exact steps failed and what is the action that is required.
- The most interesting part in this page is the "Fix" button. If for any reason the test fails you can Click on Fix button and it will try to fix the problems for you. It will do the IIS Server installation and set all other pre-requisites. COOL. So I started the Fix. Once it is fixed IaaS server will restarted.
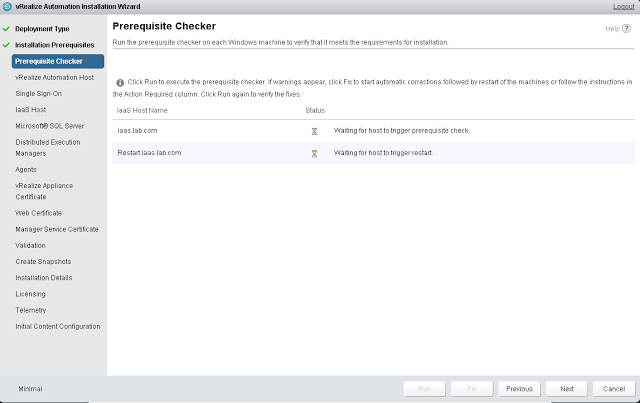
- Once the IaaS server is restarted let's again start the checking.
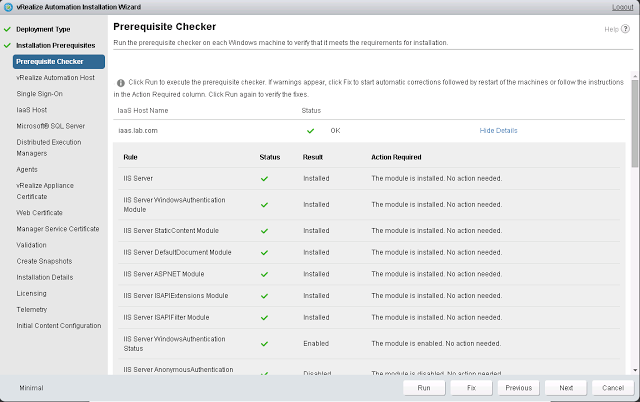
- We can see that the Pre-Requisites are met. We can see the details of the each task status as well. Remember the "Log on as Batch Job" permission which is required but not set by the Pre-Requiste checker. Also I installed MSSQL Server Express 2012 R2 in the server.
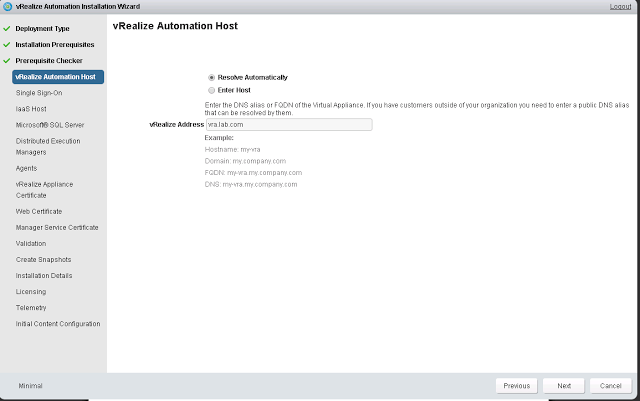
- Next we will start the vRA configuration and need to provide the vRA details. First we need to provide the vRA host FQDN.
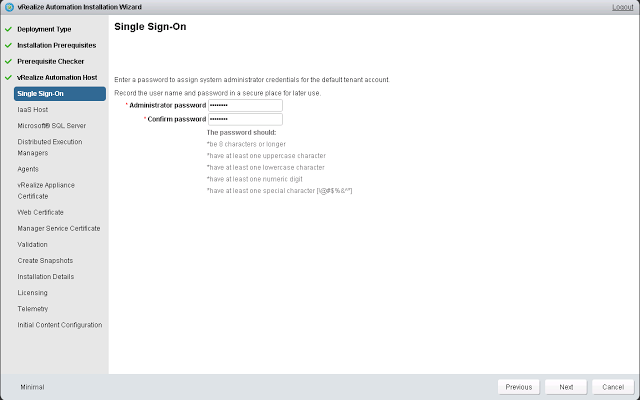
- Next provide the SSO Password.
- After this step we need to provide the Database server details. Also I had to manually enable TCP/IP Network Protocol using the method described in How to enable TCP/IP Network Protocol in MSSQL Server. In this page you can use the Default settings for the database or change it according to your requirement (it lets you select a different location for storing the database files).
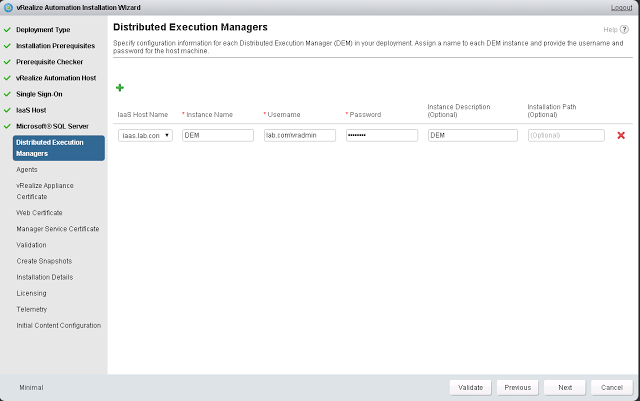
- Next you need to provide the DEM server details like instance name, user id and password.
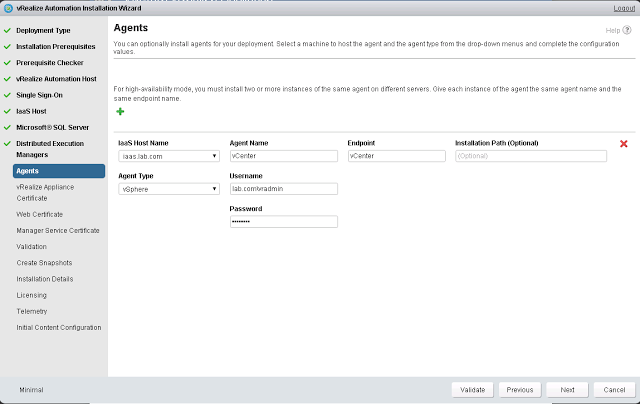
- After this you need to provide the Agent details like the Agent name and Endpoint name. Also you need to provide the Agent Type details.
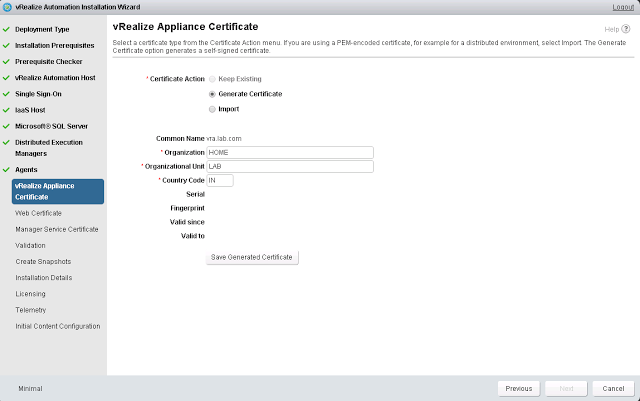
- Next, provide details of the vRA Certificate and either you an generate a certificate or Import and existing one. Also you can Save Generated Certificate for further use.
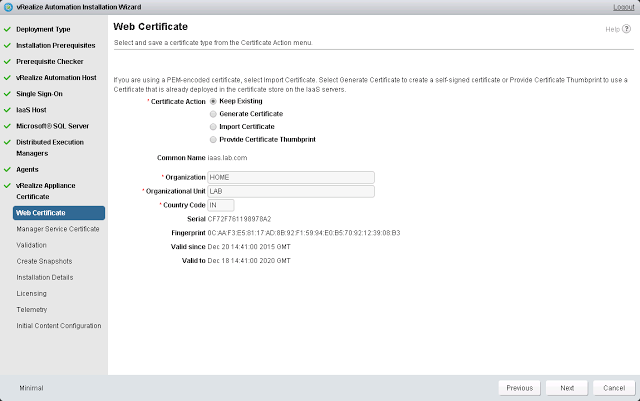
- Next we need to generate Web Certificate. Note the extra option for providing the certificate you get in the page.
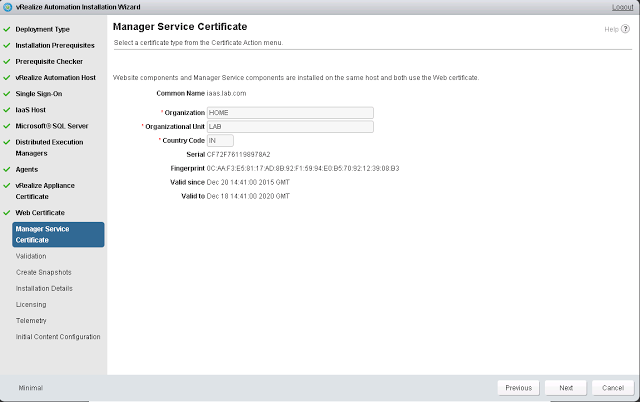
- In the next Page you need to provide Manager Service Certificate.
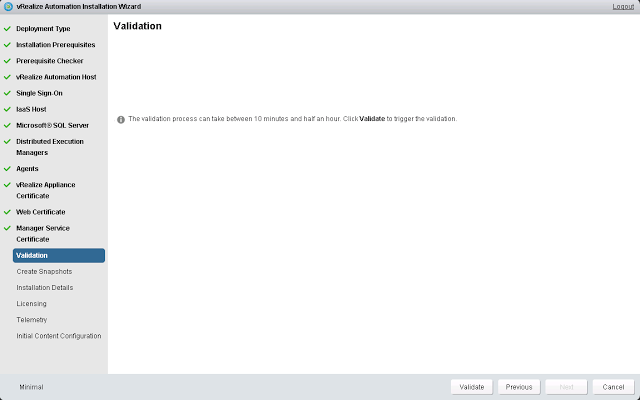
- In the next page we will validate all the setting we have done till now. Click on the Validate button to start the validation.
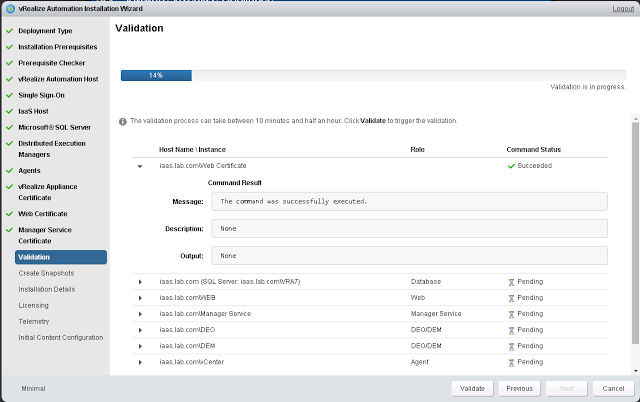
- It starts the checker and you will get details of the checks done and task percentage.
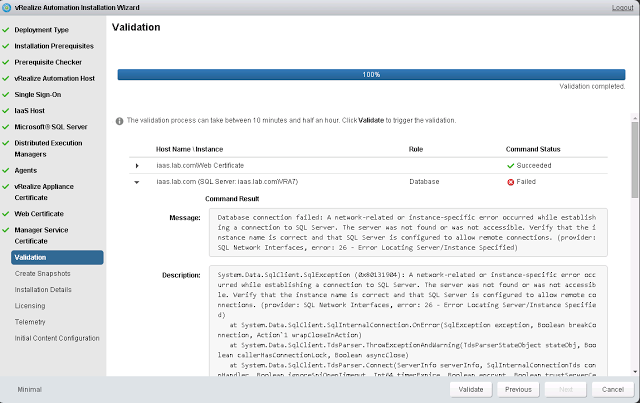
- Note some of the tests failed. This was the stage where I noticed though pre-requisites were done at a previous stage but TCP/IP Network setting was missing in DB and had to manually set it. Once I corrected the problem again click on the Validate button to revalidate the settings.
- Next we can see that all the tests were successfully validated.
- In the next stage you get a suggestion to create Snapshots of the respective VM's so that in case it is necessary you can always fail back to it.
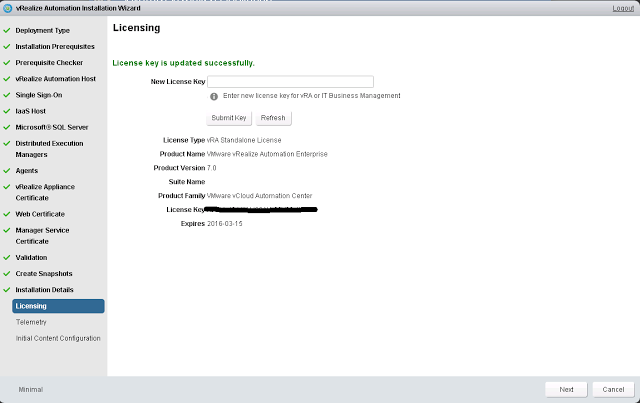
- So I took the Snapshots and in the next page started the Installation. Once the installation is completed successfully, in the next page provide the license details.
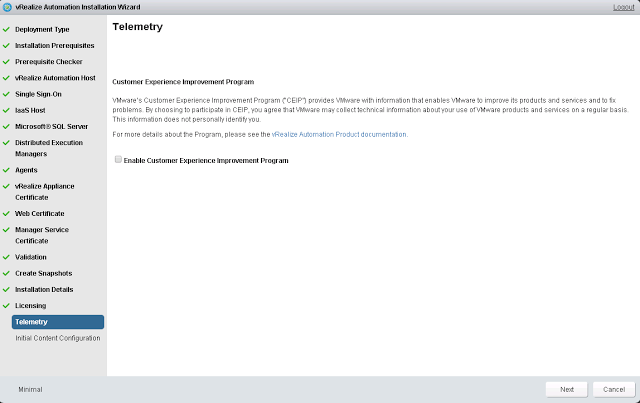
- Next, choose the Telemetry option (Optional)
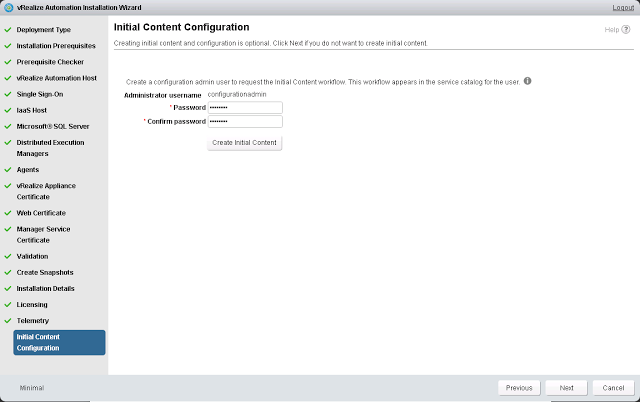
- In the next stage you need to choose whether you want to do the initial configuration. If you choose this option and an administrative user "configurationadmin" would be created for you in default tenant and when you login to the default tenant with this user id you will get a catalog item for an Initial configuration workflow. This workflow will do the initial configuration for you. In my case I selected this option as I want to test it out. So in this page I had to provide a password for the user and then click on "Create Initial Content" button.
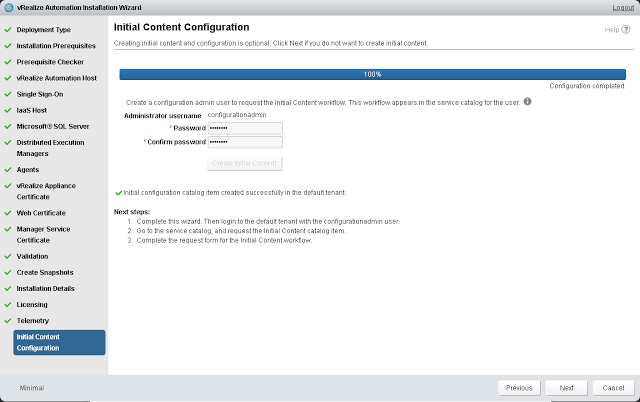
- Once done it will give you the status of the task and next steps to do for the configuration.
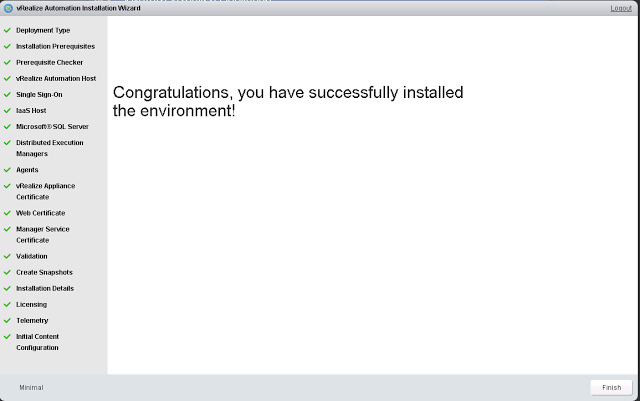
- Click next and you are done. Pretty easy and Cool
All the above screenshots are provided below:


So Stay Tuned for Part III !!!!!