Oracle Weblogic-as-a-Service for vRealize Automation
•Updated
Purpose:
Recently I got a request to build a Weblogic-as-a-Service in vRealize Automation for a customer. This post provides details of that custom built Out-of-the-Box Oracle Weblogic-as-a-Service in vRealize Automation.
Requirement:
The requirement is to deploy a Weblogic Cluster as a whole. Also, user should be able to choose any number of nodes in the cluster at runtime. For example, it may be anything within the range 1 to 20, etc.
Solution:
VMware vRealize Automation, vCenter Server and vRealize Orchestrator was used to build the overall solution. Red Hat Linux 7.2 was selected as the base operating system for the Weblogic platform. Provided below are the details of the technologies used:
VMware vRealize Automation 7.2 (It should work with other versions as well)
VMware vCenter Server 6.0 U3 (Should work with other versions as well)
VMware vRealize Orchestrator 7.2 (7.x versions should work)
RHEL 7.2
Java 1.8.0_151
Java(TM) SE Runtime Environment (build 1.8.0_151-b12)
Java HotSpot(TM) 64-Bit Server VM (build 25.151-b12, mixed mode
Oracle WebLogic Server 12.2.1.3 (Generic)
Pre-Requisites:
Provided below are the pre-requisites for the solution. There are multiple stages of the solution.
A properly installed and configured vRealize Automation should be available
Proper licenses should be available in vRealize Automation
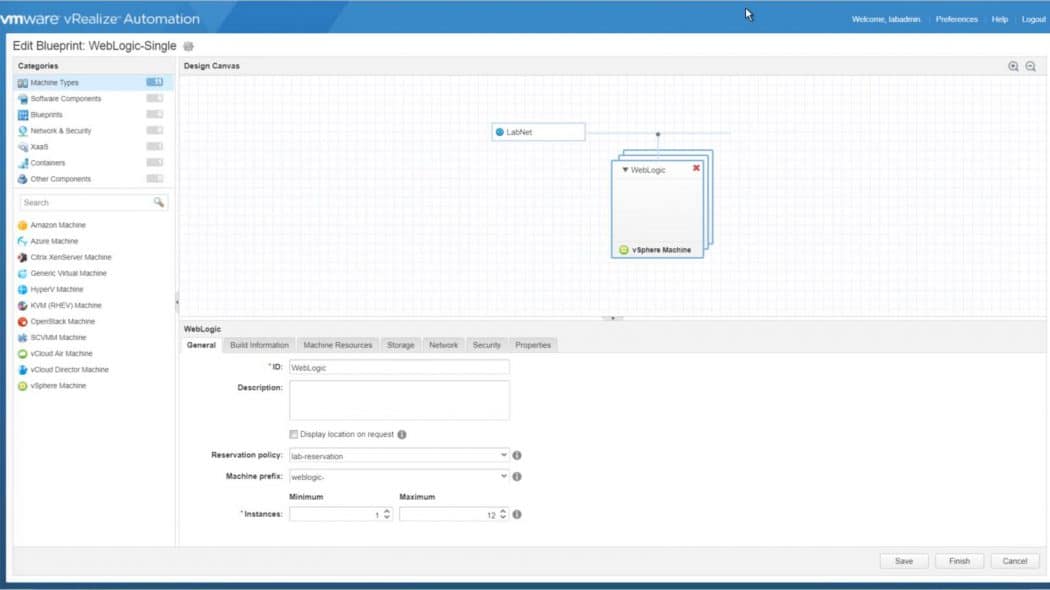
Build out the Template for the solution
Provided below are the steps for building out the Template to be used for the solution.
Step-1: Create a VM and install RHEL 7.2 in it. The VM configuration is as given below:
16GB RAM
8 GB Swap
4 vCPUs
/weblogic - 50 GB
/weblogs - 50 GB
Also, make sure to run the following commands to install required packages in the base image:
Run the following commands to create the response file
/usr/bin/cat > /WebLogic/oracle/Install.rsp << EOF

[ENGINE]

#DO NOT CHANGE THIS.

Response File Version=1.0.0.0.0

[GENERIC]

#The oracle home location. This can be an existing Oracle Home or a new Oracle Home

ORACLE_HOME=/WebLogic/oracle/middleware


#Set this variable value to the Installation Type selected. e.g. Fusion Middleware Infrastructure, Fusion Middleware Infrastructure With Examples.

INSTALL_TYPE=WebLogic Server

#Provide the My Oracle Support Username. If you wish to ignore Oracle Configuration Manager configuration provide empty string for user name.

MYORACLESUPPORT_USERNAME=

#Provide the My Oracle Support Password

MYORACLESUPPORT_PASSWORD=<SECURE VALUE>

#Set this to true if you wish to decline the security updates. Setting this to true and providing empty string for My Oracle Support username will ignore the Oracle Configuration Manager configuration

DECLINE_SECURITY_UPDATES=true

#Set this to true if My Oracle Support Password is specified

SECURITY_UPDATES_VIA_MYORACLESUPPORT=false

#Provide the Proxy Host

PROXY_HOST=

#Provide the Proxy Port

PROXY_PORT=

#Provide the Proxy Username

PROXY_USER=

#Provide the Proxy Password

PROXY_PWD=<SECURE VALUE>

#Type String (URL format) Indicates the OCM Repeater URL which should be of the format [scheme[Http/Https]]:/[repeater host]:[repeater port]

COLLECTOR_SUPPORTHUB_URL=

EOF
Next, import the vRO package “com.vmware.library.weblogic-as-a-service.package” in vRealize Orchestrator server.
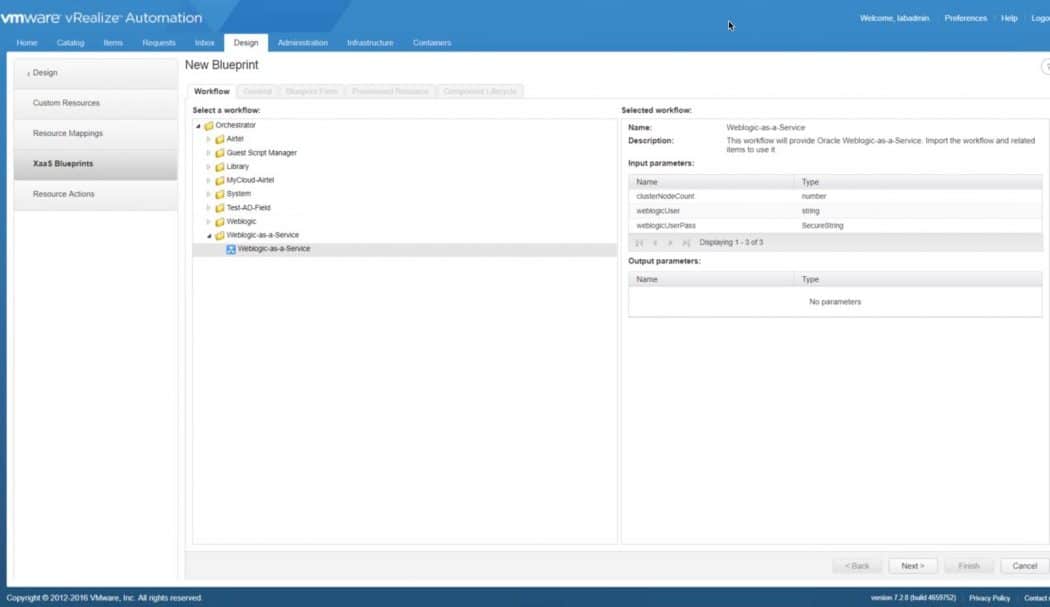
Build the Catalog Item:
Next, build a XaaS catalog item in vRealize Automation. Login to vRA with a user with proper rights to create a XaaS Blueprint. Go to Design à XaaS à XaaS Blueprints. Click on New, in the new window, select “Weblogic-as-a-Service” workflow under the Weblogic-as-a-Service Folder in vRO workflow list. Press next and select all the default values.
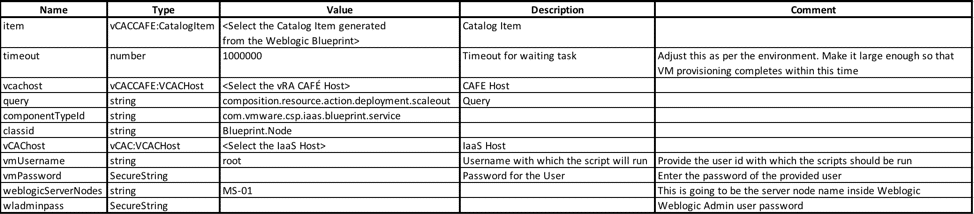
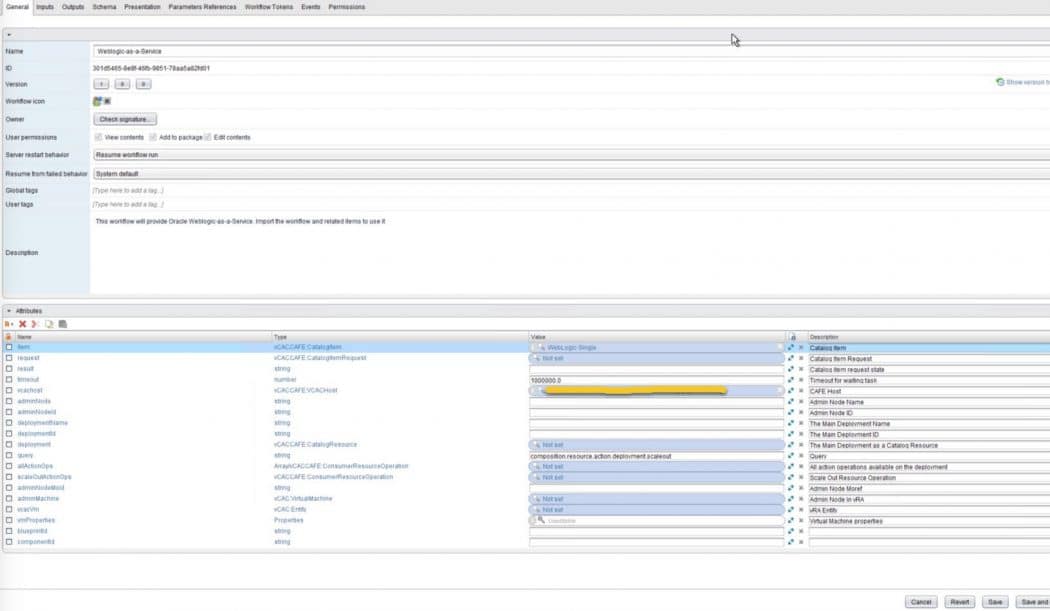
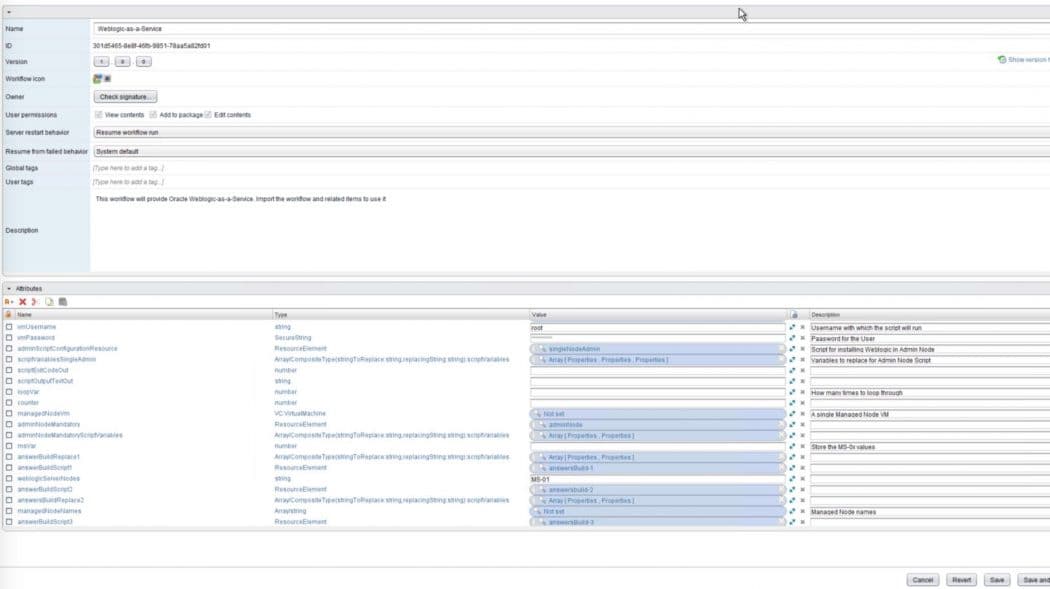
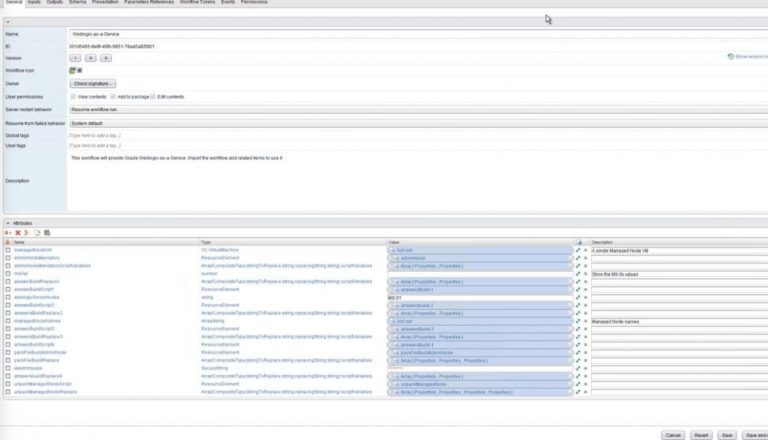
Setting up Values in vRO
We need to set up the following values in “Weblogic-as-a-Service” in vRO.
Provided below are few screenshots as an example.
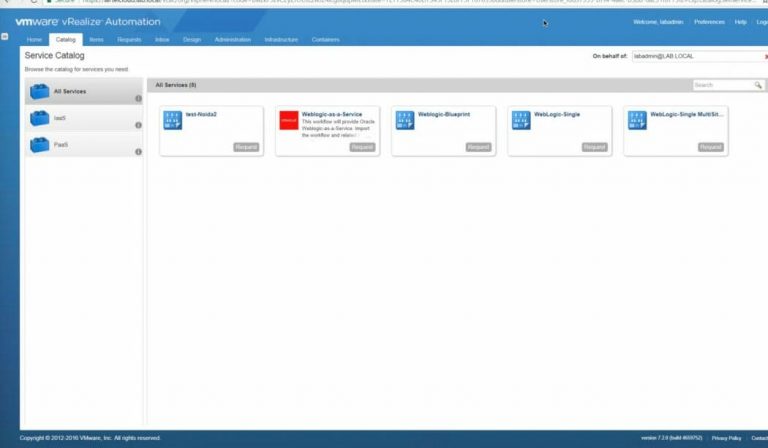
Requesting the Item
Login to the vRealize Automation portal with proper rights. Select the exported Catalog Item and Click on “Request”.
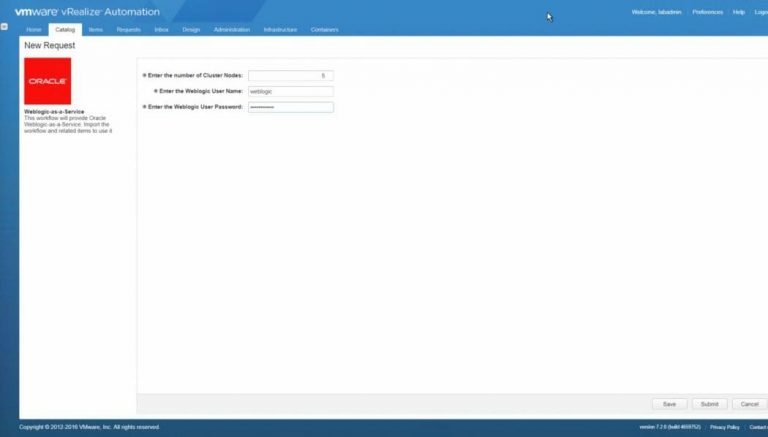
In the next page provide the following details:
Enter the number of Cluster Nodes:
Enter the Weblogic User Name:
Enter the Weblogic User Password:
Once the request is submitted, it will initiate tasks in vRO which in turn will initiate the following serial tasks in vRA.
Deploying an instance of the Weblogic Catalog Item
Scale out the Deployment from above step as per the number of cluster nodes.
Once both the above tasks as finished, rest of the Weblogic installation and configuration will be done in vRO
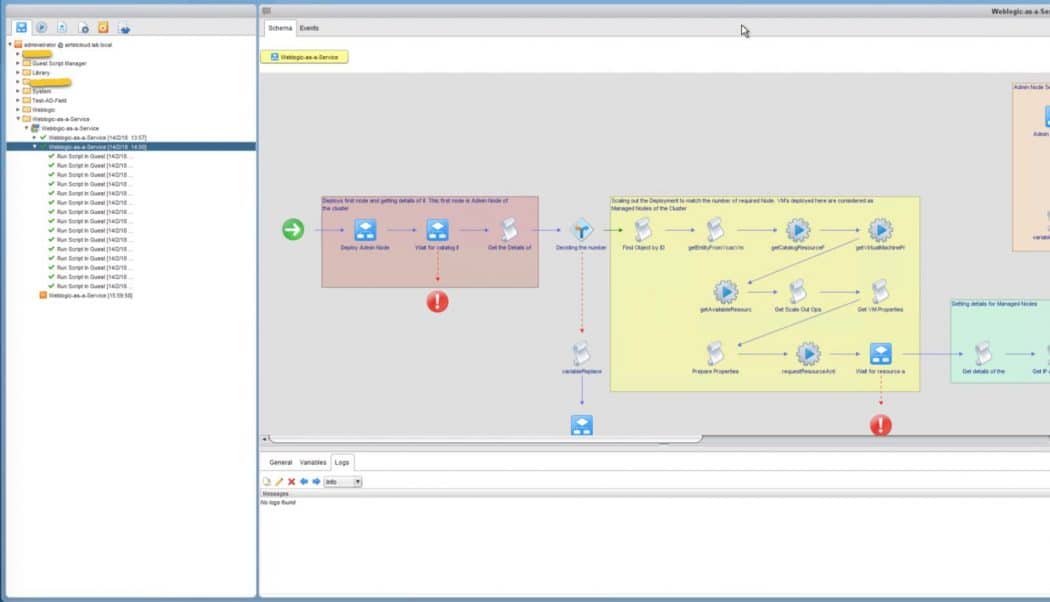
Once all the above is complete, the original Catalog Item request of “Weblogic-as-a-Service” will complete and marked as “Successful”. A typical successful workflow run in vRO looks like following:
Testing the Deployment
Once the Request is successful, identify the Admin node with the lowest denominator. For example, if you had chosen a 4-node cluster and the nodes are named as weblogic-1, weblogic-2, weblogic-3 and weblogic-4 then weblogic-1 is the Admin node. Remember, the node with lowest number is always the Admin node as it is deployed first.
Note, the IP of the Admin Node. SSH to the admin node and run the following commands:
# cd /WebLogic/oracle/middleware/user_projects/domains/base_domain/bin
# nohup ./startNodeManager.sh &
# nohup ./startWebLogic.sh &
# ./startManagedWebLogic.sh MS-01 http://<IP of Admin Node>:7001
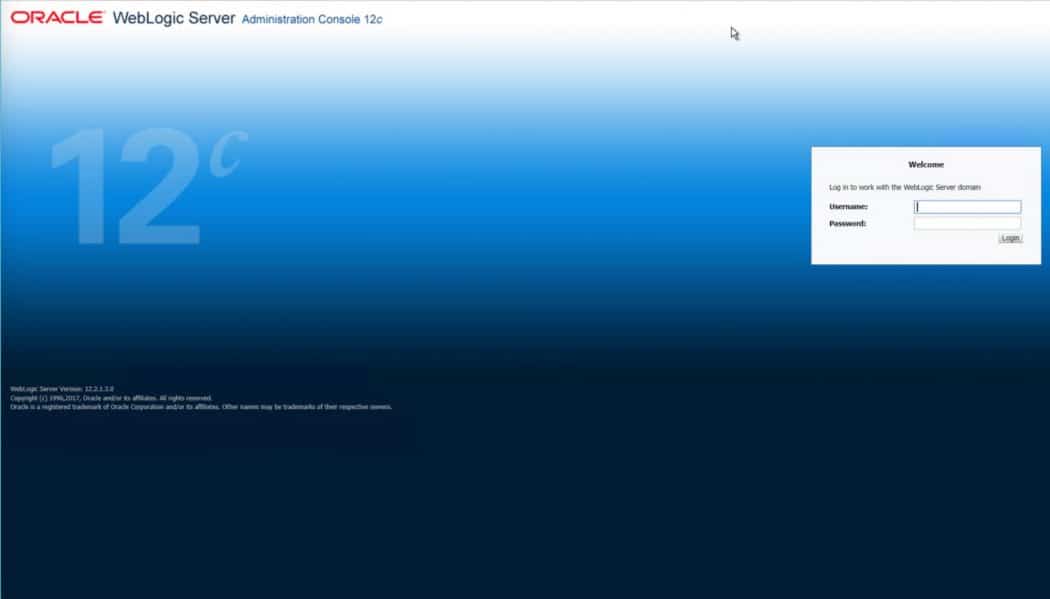
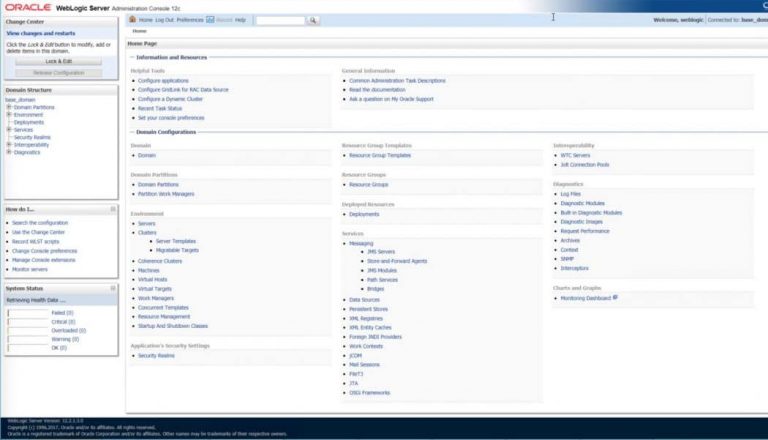
Note, the last command. MS-01 is the admin node, provide the IP address of Admin node in the URL. After the above open the following URL in a browser: http://:7001/console This will open the Weblogic Console. Login with Weblogic admin user id and password provided at setup time. In my case, the user was “weblogic”.
Workflow Explanation
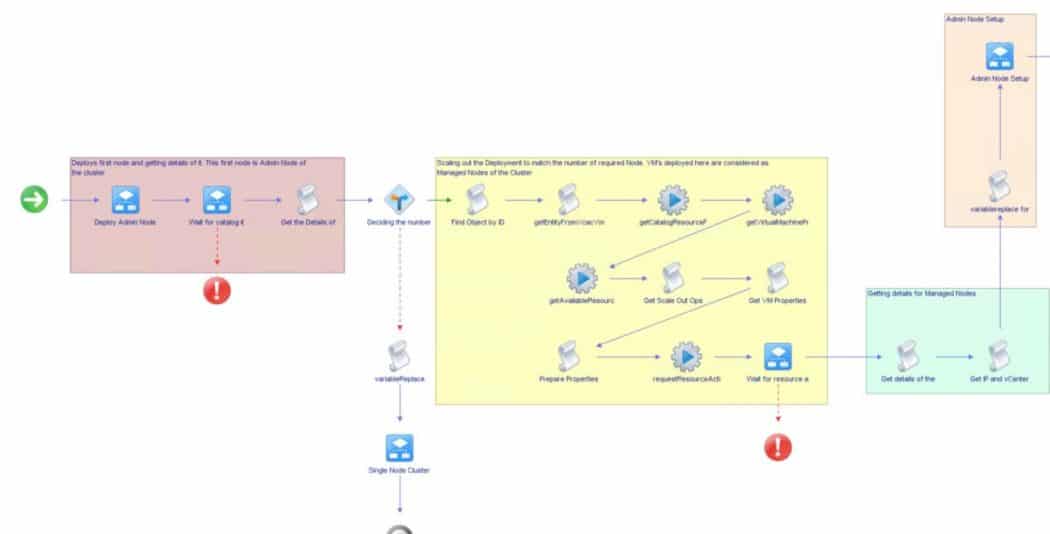
The vRO workflow is divided into multiple parts.
The first part deploys the required number of VM’s in vRA and collects the relevant information about them (IPADDRESS, Hostname etc.)
The Second part runs the scripts inside the Guest Operating system of the nodes to install and configure Weblogic Cluster in the nodes.
In the next section, we will elaborate each one of them.
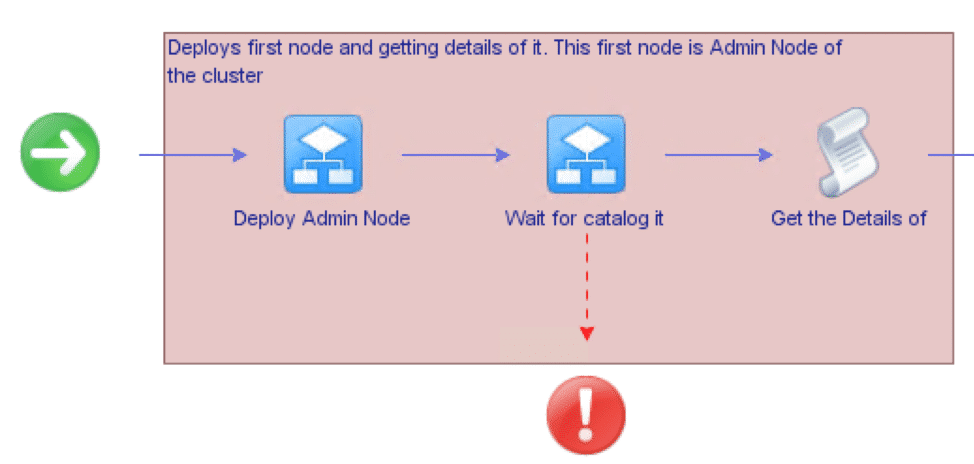
First part of the script requests the deployment in vRA. This first VM is considered the Admin node.
In the next part, depending on the number of nodes, if a single node cluster is selected, then a Single Node Cluster configuration is set.
The script related to single Node Cluster is provided below:
Next, build a XaaS catalog item in vRealize Automation. Login to vRA with a user with proper rights to create a XaaS Blueprint. Go to Design à XaaS à XaaS Blueprints. Click on New, in the new window, select “Weblogic-as-a-Service” workflow under the Weblogic-as-a-Service Folder in vRO workflow list. Press next and select all the default values.
Setting up Values in vRO
We need to set up the following values in “Weblogic-as-a-Service” in vRO. Provided below are few screenshots as an example.
Requesting the Item
Login to the vRealize Automation portal with proper rights. Select the exported Catalog Item and Click on “Request”.
In the next page provide the following details:
Enter the number of Cluster Nodes:
Enter the Weblogic User Name:
Enter the Weblogic User Password:
Once the request is submitted, it will initiate tasks in vRO which in turn will initiate the following serial tasks in vRA.
Deploying an instance of the Weblogic Catalog Item
Scale out the Deployment from above step as per the number of cluster nodes.
Once both the above tasks as finished, rest of the Weblogic installation and configuration will be done in vRO
Once all the above is complete, the original Catalog Item request of “Weblogic-as-a-Service” will complete and marked as “Successful”. A typical successful workflow run in vRO looks like following:
Testing the Deployment
Once the Request is successful, identify the Admin node with the lowest denominator. For example, if you had chosen a 4-node cluster and the nodes are named as weblogic-1, weblogic-2, weblogic-3 and weblogic-4 then weblogic-1 is the Admin node. Remember, the node with lowest number is always the Admin node as it is deployed first.
Note, the IP of the Admin Node. SSH to the admin node and run the following commands:
# cd /WebLogic/oracle/middleware/user_projects/domains/base_domain/bin
# nohup ./startNodeManager.sh &
# nohup ./startWebLogic.sh &
# ./startManagedWebLogic.sh MS-01 http://<IP of Admin Node>:7001
Note, the last command. MS-01 is the admin node, provide the IP address of Admin node in the URL. After the above open the following URL in a browser: http://:7001/console This will open the Weblogic Console. Login with Weblogic admin user id and password provided at setup time. In my case, the user was “weblogic”.
Workflow Explanation
The vRO workflow is divided into multiple parts.
The first part deploys the required number of VM’s in vRA and collects the relevant information about them (IPADDRESS, Hostname etc.)
The Second part runs the scripts inside the Guest Operating system of the nodes to install and configure Weblogic Cluster in the nodes.
In the next section, we will elaborate each one of them.
First part of the script requests the deployment in vRA. This first VM is considered the Admin node.
In the next part, depending on the number of nodes, if a single node cluster is selected, then a Single Node Cluster configuration is set.
The script related to single Node Cluster is provided below:
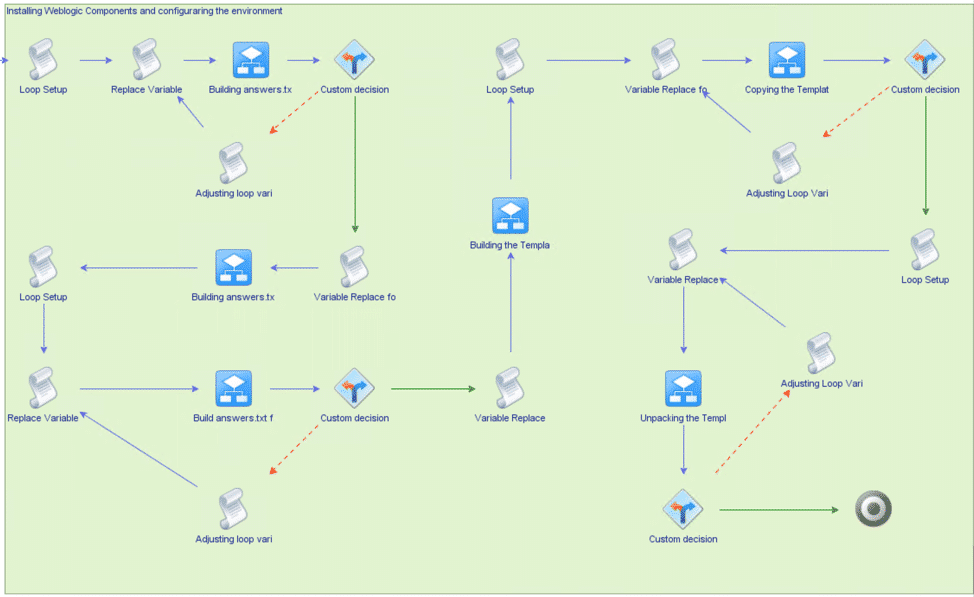
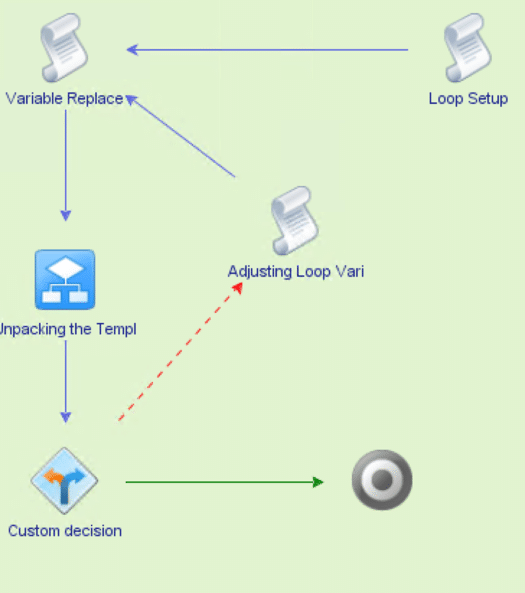
Next comes the second major part of the Workflow. In this section, we configure the managed nodes.
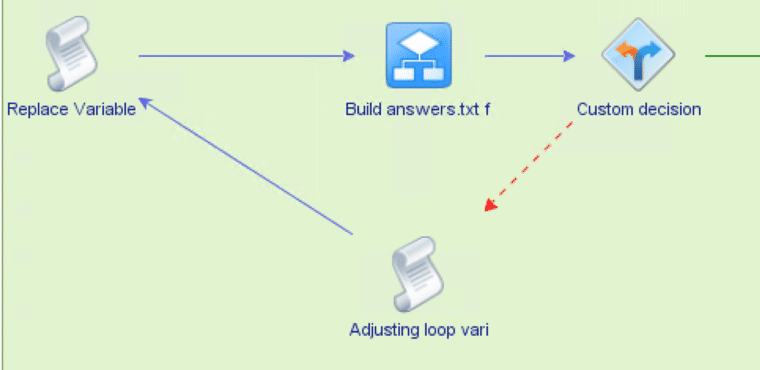
In this portion, we are dynamically building an answers.txt file which will have all the inputs for the Weblogic Cluster. This file is dynamic as the number of nodes vary and so does the IPADDRESS and Hostname. Let’s break up and elaborate the parts one by one.
The script used in answersBuild1 is provided below:
Once the VM's are deployed in vRA and later configuring the Weblogic packages if the workflows fail, the VM's remain in vRA. The VM's are not cleared.
As a future option, I plan to add an action item which will let the end user add a number of nodes at a later point in time
Conclusion:
Using the process described in the post you can create Oracle Weblogic-as-a-Service in vRealize Automation environment. As always do let me know if this was helpful to you.
This website uses cookies
Select which cookies to opt-in via the checkboxes below; my website uses cookies to examine site traffic and user activity while on my site, to provide social media functionality. More details...
Cookie settings
We use cookies to enhance your browsing experience, serve personalized ads or content, and analyze our traffic. By clicking "Accept All", you consent to our use of cookies. More details...