Purpose
NSX and vRealize Automation are two major products from VMware. You use vRealize Automation to build a Cloud environment and use NSX for building a Software-Defined-Network environment. Individually they are awesome products and when you mix them up, you get an overdose of awesomeness. Fun apart, the actual power of Software Defined Datacenter comes into play when you use them together.
With NSX you can build Dynamic routing, load balancing, firewall rules etc. Now think of this scenario, how cool will it be if you can spin a multi layer application all by a single click along with it’s network, firewall rules and load balancer auto-configured at the runtime. So every time anyone deploys one such instance their respective configurations are also build by runtime. At the time of deletion all these network, firewall and load balancers are also deleted automatically. I am not even talking about other features that NSX brings into the game. So in this blog series I am going to talk about how to integrate NSX with vRealize Automation and then use the network functionalities provided by NSX to build a multi-machine blueprint and use it to deploy three tier workload. In the first part I will cover the integration of NSX and vRealize Automation. In the second part I will cover the building of the blueprint and in the third part will consist of the results. So without further ado let’s start the series. The process which integrates NSX with vRealize Automation (vRA) is detailed below:
- First you need to install NSX plugin in vRealize Orchestrator (vRO). Both internal and external vRO is supported. For this blog I chose to use external vRO appliance.
- Second, you need to add the NSX manager as an endpoint in vRO appliance.
- You need to add vRealize Orchestrator as an End Point in vRealize Automation and run a discovery of resources.
- Now all the NSX information will be available in vRealize Automation to be consumed by the blueprints.
Let’s start with the plugin installation in vRO.
Installation of the NSX Plugin in vRO
To upload and install NSX plugin you need to download the NSX plugin for vRO from the VMware download link.
Note the following from the site: This plug-in (1.0.4) can be utilized by vRA 7.1.0, vRO 7.1.0, NSX-vSphere 6.2.2, NSX-vSphere 6.2.4.
So, this works with only the above versions of the products. But the general process applies to other versions as well. Once you have downloaded the plugin, you need to go to controlcenter of vRealize Orchestrator. You can use both the internal vRO or an external appliance.
Also, to go to ControlCenter you can either directly go to the controlcenter by going to https://:8283/vco-controlcenter/ or by going to the default page and from there select the Orchestrator Control Center link: https://<IP or FQDN of vRO Server:8281/vco/
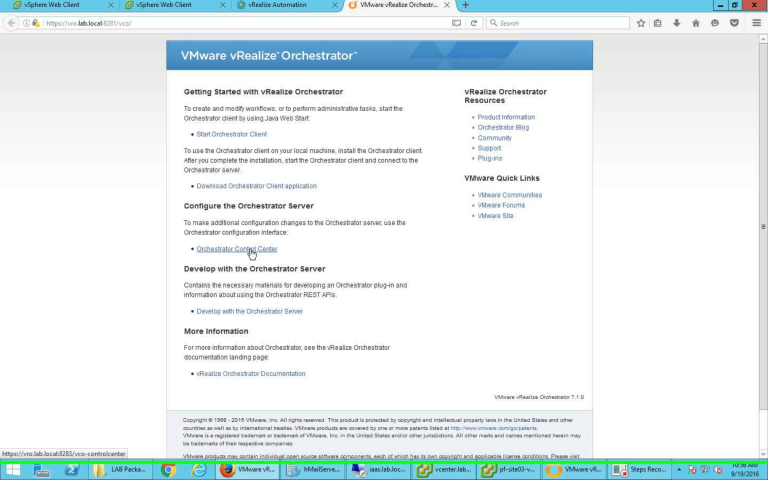
vRO Control Center
Clicking on the link takes you to the control center page and will ask for your password. Use the “root” user id and the password that you have set at the time of deployment.
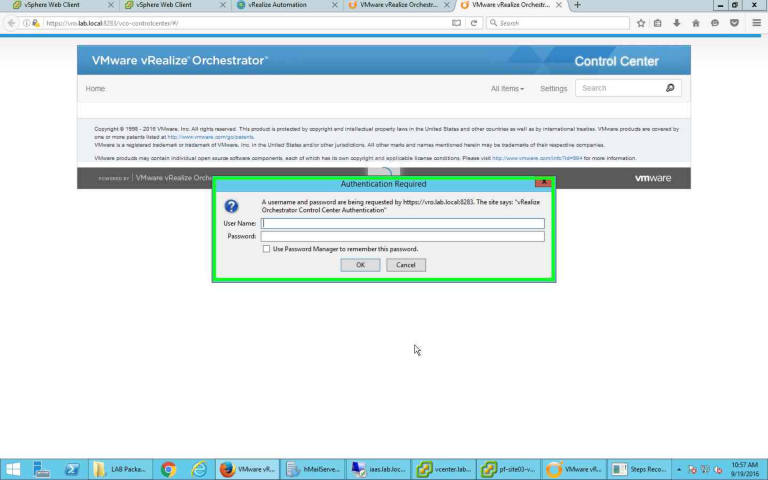
Providing ID and Password
Once in the Control Center scroll down to select “Manage Plug-Ins”.
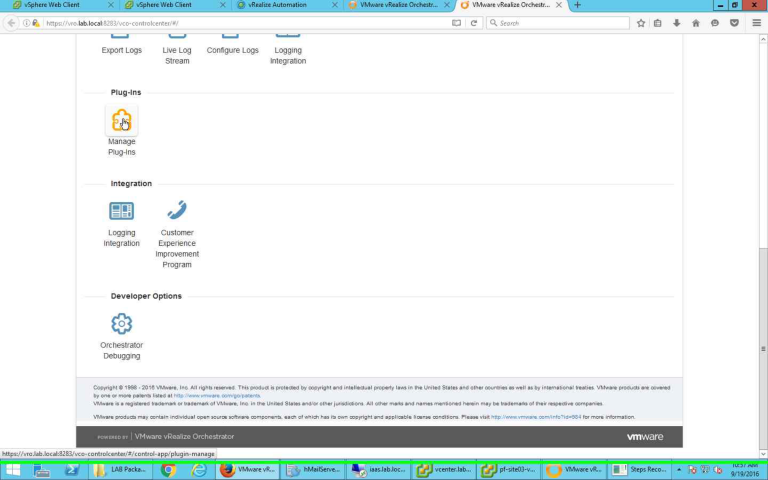
Click on Manage Plug-Ins
In the Manage Plug-Ins window select on Browse to browse to the folder where the plugin is and select the same.
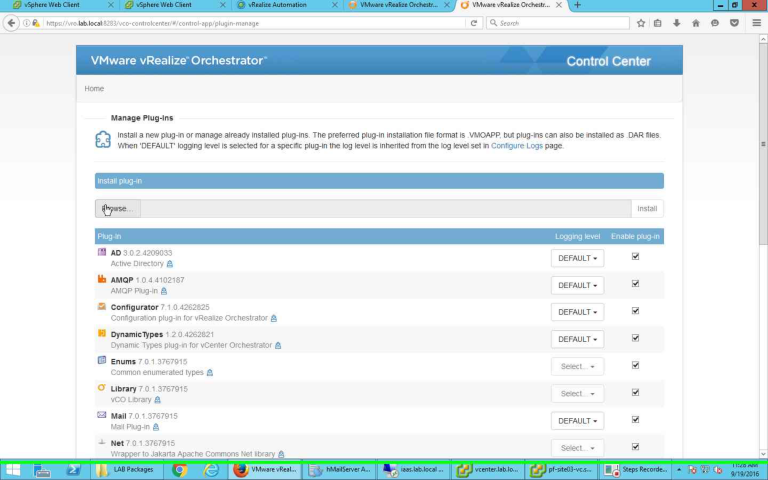
Click on Browse
Select the Plugin and Click on Open.
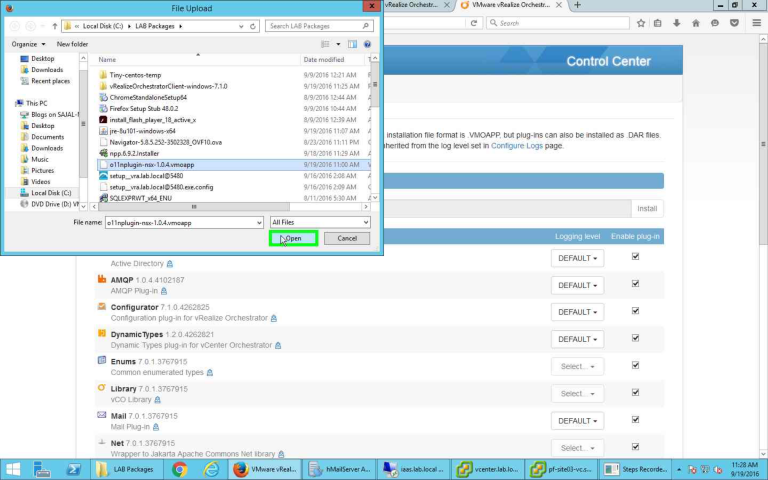
Select plugin
Once the plugin is selected, click on Install.

Start of Installation
Accept the EULA and Click on Install to start the installation.
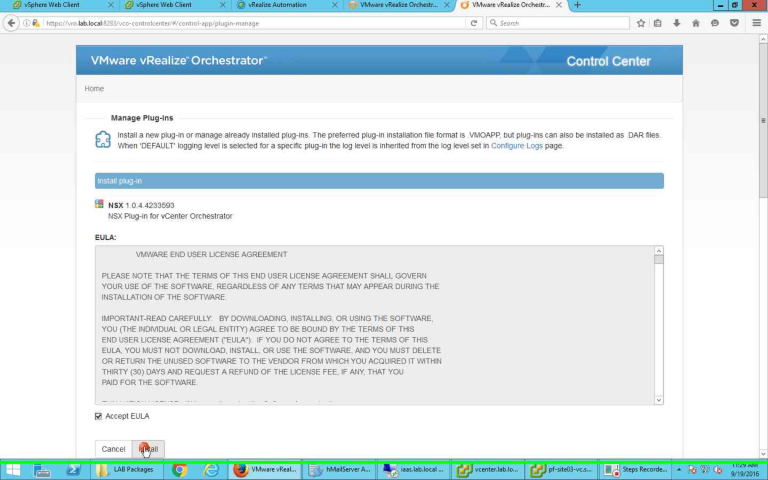
Accepting EULA
Once the installation is completed, you get a prompt to restart the server. The same page also gives you a link to the “Startup Options” page from where you can do the same.
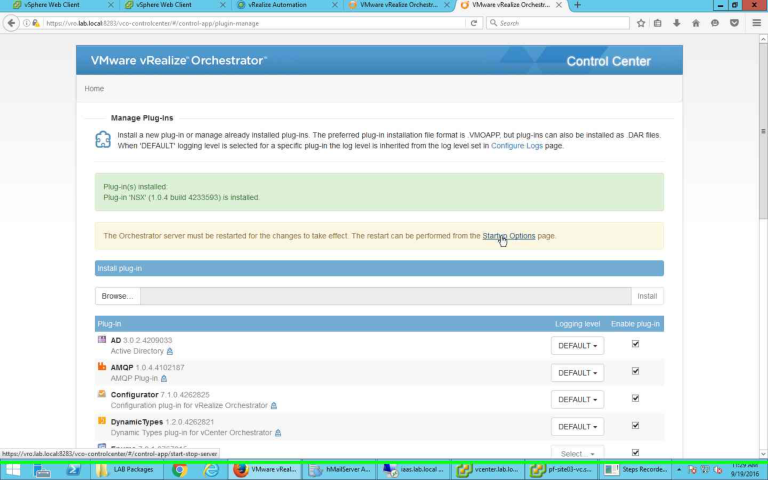
After installation, go to restart serve page
From the “Startup Options” page click on Restart button to restart the server.
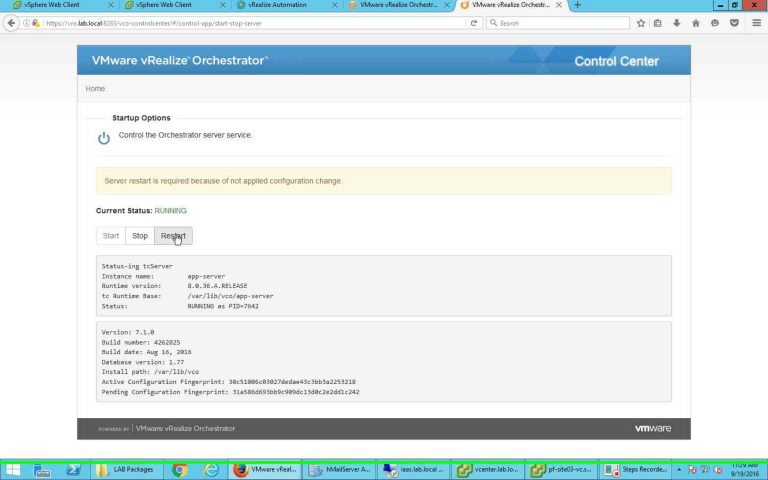
Restart the server
Once the restart is completed. You are done. The plugin has been installed.

Server restarted
Double check the installation of the plugin. NSX plugin should be listed and should be selected as well.
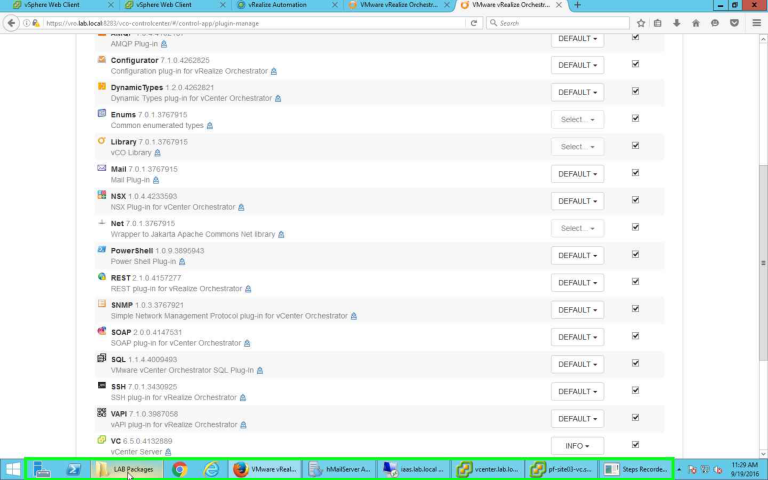
Since the plugin is installed, next you need to configure and integrate with vRA.
Configuration of NSX in vRO / vRealize Automation
In this part you need to do the following two steps:
- Add the NSX endpoint in vRealize Orchestrator
- Add the vRealize Orchestrator as an endpoint in vRealize Automation Server
You need to start with the Orchestrator. So login to the Orchestrator Client with the credentials. Please note the following:
- If you are using the internal vRO server of vRealize Automation, then the “Host Name” field should have the format as .
- If you are using the external vRO server, then the “Host Name” field should have the format as
Note, the port difference. For internal vRO server of a vRA server you need to use port 443 and for external vRO server you need to use port 8281.

Connecting to vRealize Orchestrator
Once logged in, by default you would be in “Run” mode of vRO. To add the NSX endpoint go to Workflows tab.
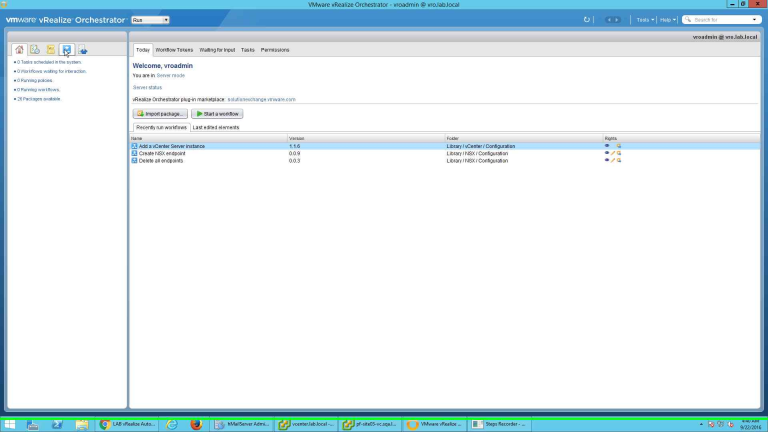
Opening Workflows tab
Next, go to Library –> NSX –> Configuration –> Create NSX Endpoint. We will run this particular workflow to add the NSX manager as an endpoint. Click on the Green button at the top to run the workflow.
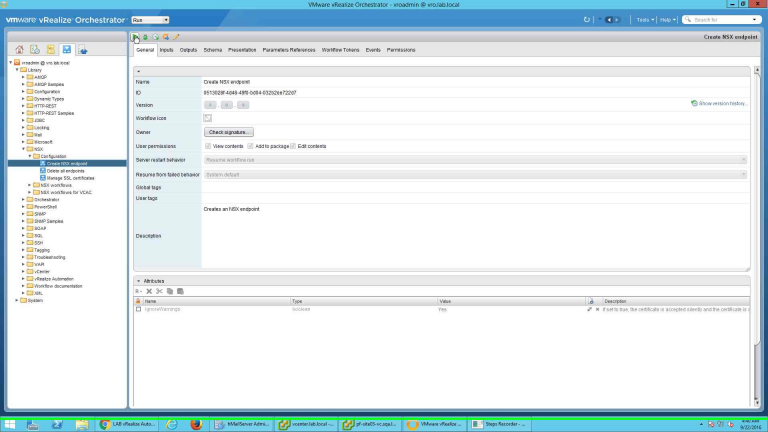
Running Workflow
When the workflow is run it provides a form where you can provide the information. You need to provide the following information:
- Endpoint Name
- NSX user name
- NSX Password
- NSX URL
The next two options are pre-populated and you can keep them at their default.
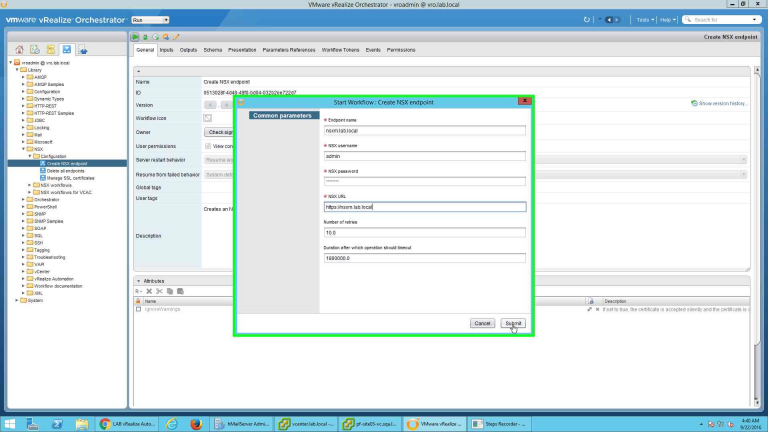
Providing details of NSX Manager
Wait for the successful run of the workflow. When it completes successfully, NSX Manager is added as a managed endpoint in vRO.
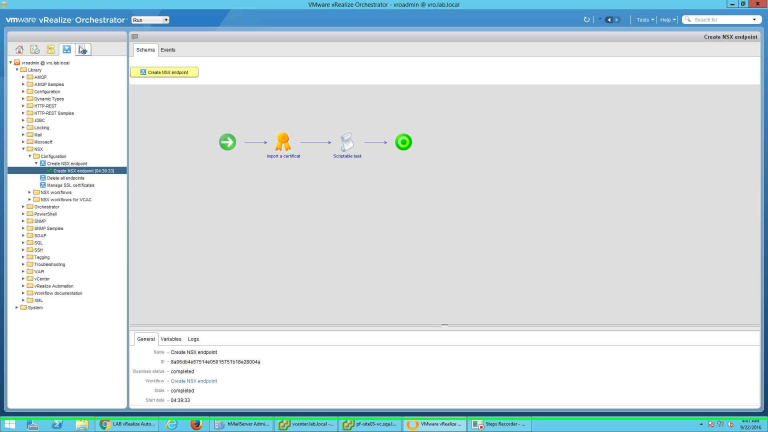
Successful Completion of NSX endpoint addition
Once the endpoint is added successfully, you can go ahead and check the details from the endpoint. It should show each and every component you have configured in your NSX Manager.
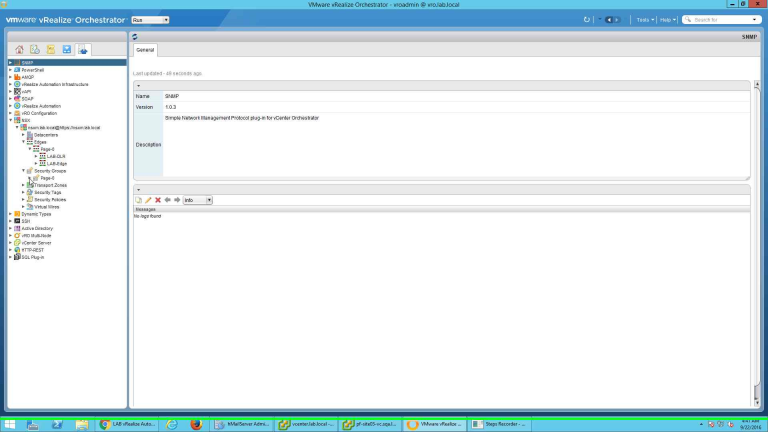
Details checking
Your configuration at vRO is finished. Next you need to go to vRA and add this vRO as an Endpoint. Login to vRA server tenant as “IaaS Administrator” so that you can add an Endpoint. Go to Infrastructure –> Endpoint –> Endpoint. Click on New –> Orchestration –> vRealize Orchestrator.
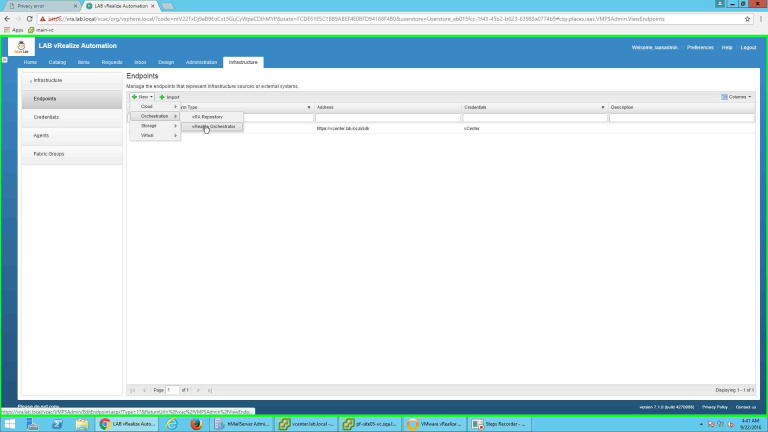
Adding vRO Endpoint
Provide the Endpoint a name. Provide the name of the vRO server in the appropriate box. Please note the following:
- If you are using the internal vRO server then the Address is “https://<IP or FQDN of vRO/vco”
- If you are using external vRO server then the address is “https://<IP or FQDN of vRO:8281/vco”
So, for external vRO server you need to provide the port number as 8281. For internal vRO no need to specify any port.

Details of vRO
Click on the button next to “Credentials” to add a credential to use. It will provide a new window. Click on New button to add a new credential (you can use an existing one as well).
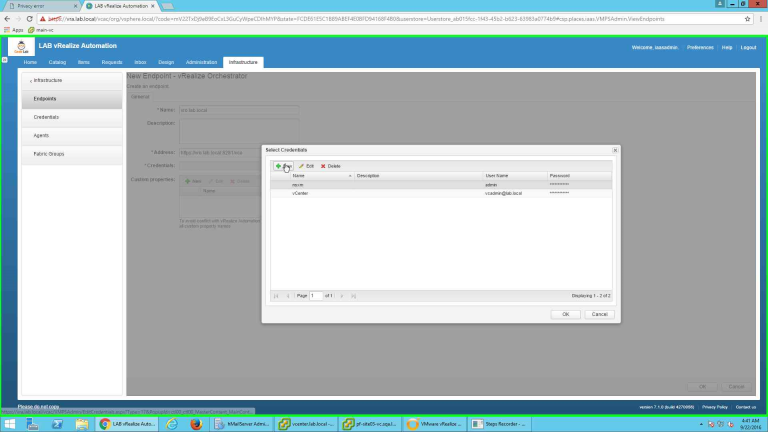
Add new credential
Provide details of the credential and click on Green button to save the details.
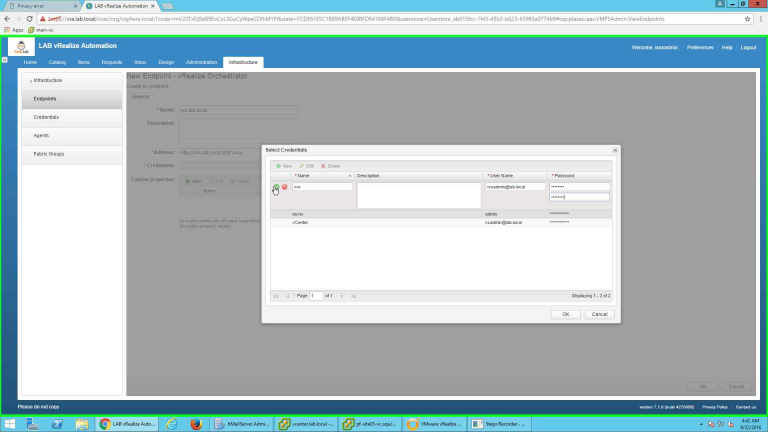
Details
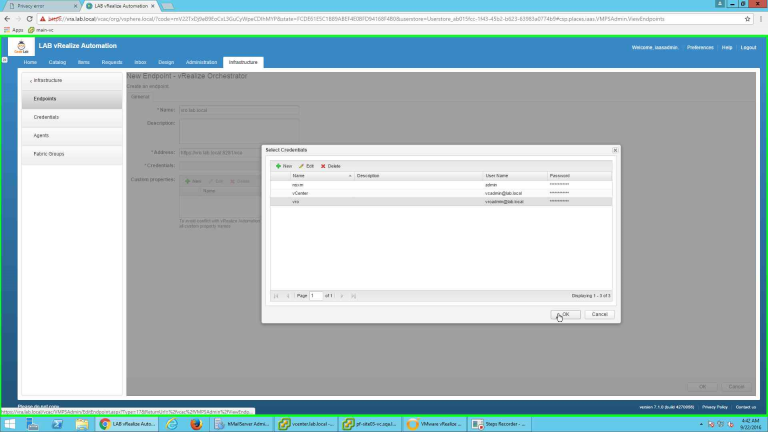
Click on OK button to save the credential and use it.
Important point. Here you need to add a Custom Property for vRO specifying the priority. Since I did not provide this property, it will give me an error.
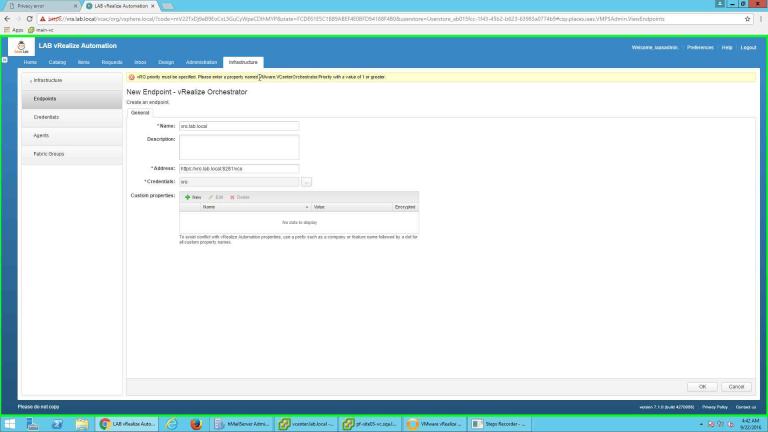
Priority setting error
Set a customer property with “VMware.VCenterOrchestrator.Priority” and set a value in it. I set 1 as property value. Click on OK to save the endpoint.
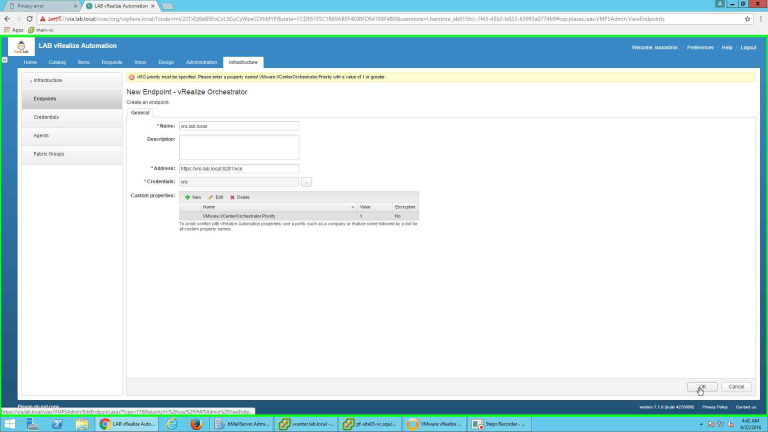
Custom property value set
Once saved, it will start the data collection. Wait for the data collection to be complete.


Once the data collection is completed successfully our configuration is complete. To check whether everything is running fine, go ahead and configure NSX as a resource point in vCenter Endpoint. So go to the configured vCenter Endpoint and select “Specify manager for network and security platform”. You need to provide nsx manager IP or FQDN and credential for that.
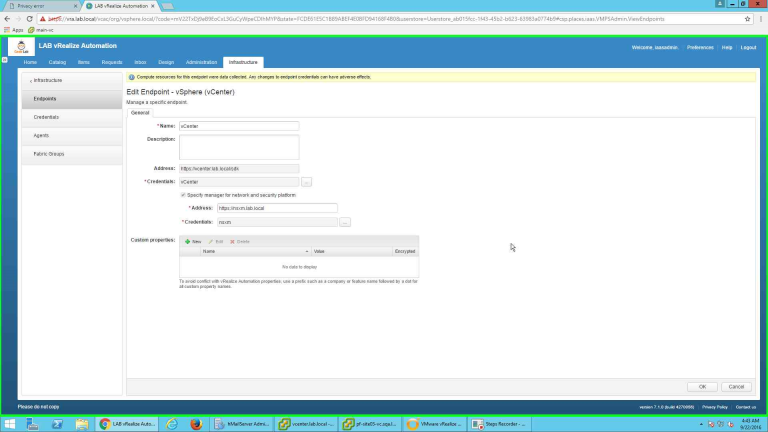
Details of NSX and part of vCenter Endpoint
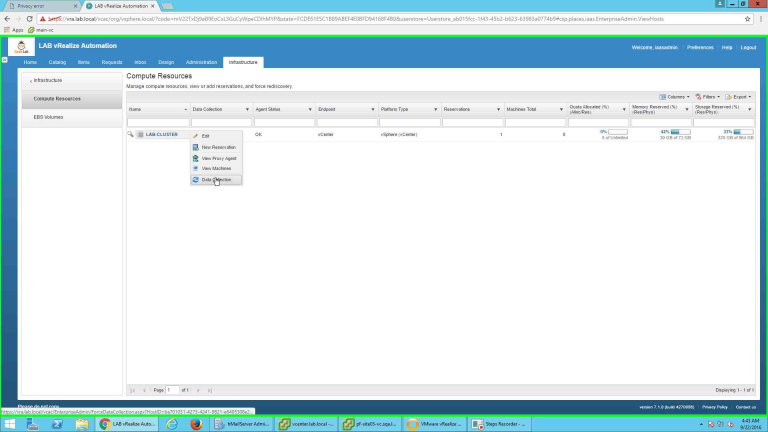
Next, we need to force a Data Collection at vCenter Endpoint so that it will get all the entities available from NSX Manager. For this go to Compute Resources and select the Compute Resource which came from that vCenter Endpoint. Right Click and Select “Data Collection”
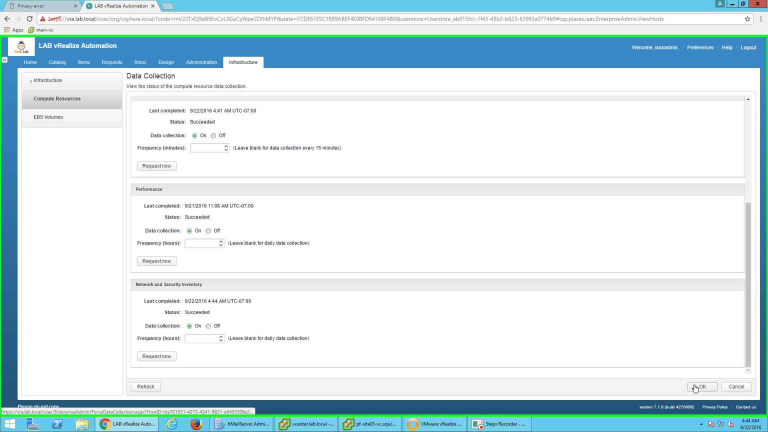
Under Network and Security Inventory click on “Request Now” button to start the data collection. Note, here I got a failed data collection as earlier I added the NSX manager before adding the NSX manager in vRO and adding vRO as an endpoint. So vRealize Automation could reach NSX manager from vCenter endpoint (it was a valid URL) but it did not know how to get the data from NSX Manager.

Now after all these configurations the data collection is successful. Click on OK to go back to earlier page.
You can check and reserve resources from NSX now. To do that, go to Reservation and add/modify a reservation to include network elements.
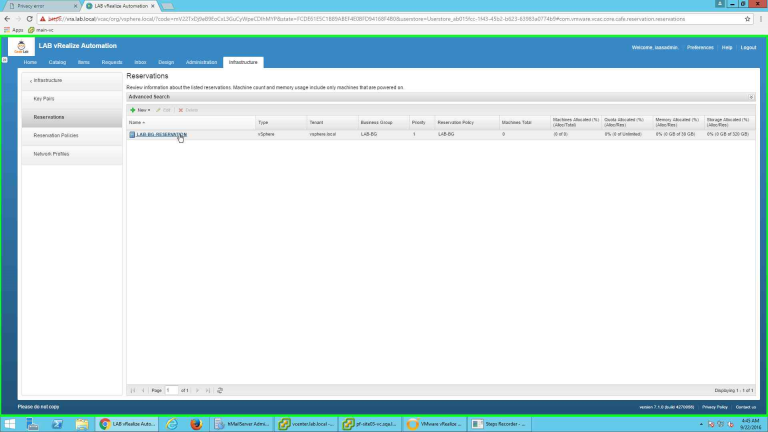
Note, I can see all the portgroups created by NSX Manager and the Transport Zone, Security Group and Routed Gateways.
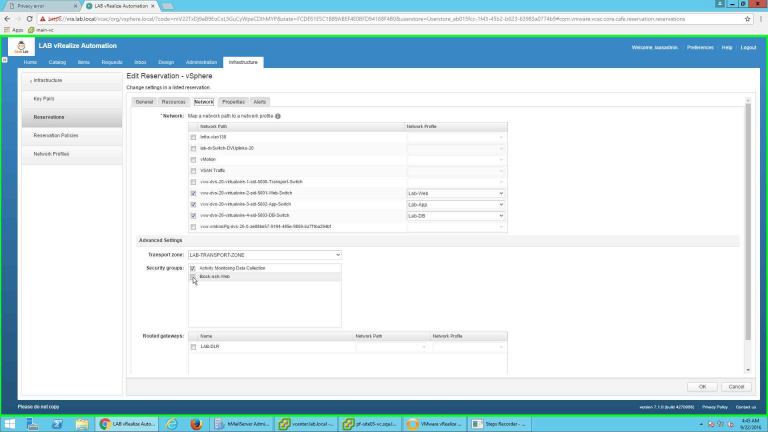
Select what you require and click ok to save the reservation.
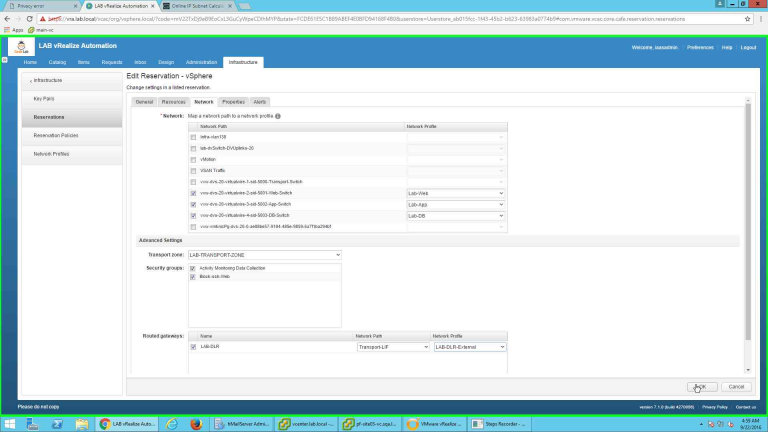
Reservation
Configuration and Integration of NSX to vRealize Automation environment is complete. Now you should be able to use the entities presented by NSX environment from inside vRealize Automation.
Conclusion
In the Part I on this blog series I have covered how to install NSX plugin in vRealize Orchestrator and then integrate vRealize Orchestrator as an Endpoint in vRealize Automation server. Also after this post you should be able to utilize entities from NSX in vRealize Automation reservations. In the next part I am going to cover how to utilize these entities in a Blueprint and create those functionalities at the runtime.