Hello,
My last post was about monitoring NSX environment using vRealize Network Insight. That is an amazing tool and a must have if you have NSX in your environment. In the meantime I thought of writing a post on using vRealize Operations (vRops) to monitor NSX environment. This is going to be a two part blog where in the first part I will cover the installation and configure portion and in the second part will explore the solution.
To start with you need to install NSX plugin for vROps. Go to Solution Exchange and download from the link https://solutionexchange.vmware.com/store/products/management-pack-for-nsx-for-vsphere-3-1-x . In the link you can check the requisite for the package as well. Note it is supported for vROps version 6.1.x, 6.2.x and the latest 6.3. It is not supported on version 6.0. Also check other compatibilities as well. Current the PAK version is 3.1.x. So let's assume we have downloaded the PAK file (vmware-MPforNSX-vSphere-3.1.1-4247401.pak) and ready to upload the file.
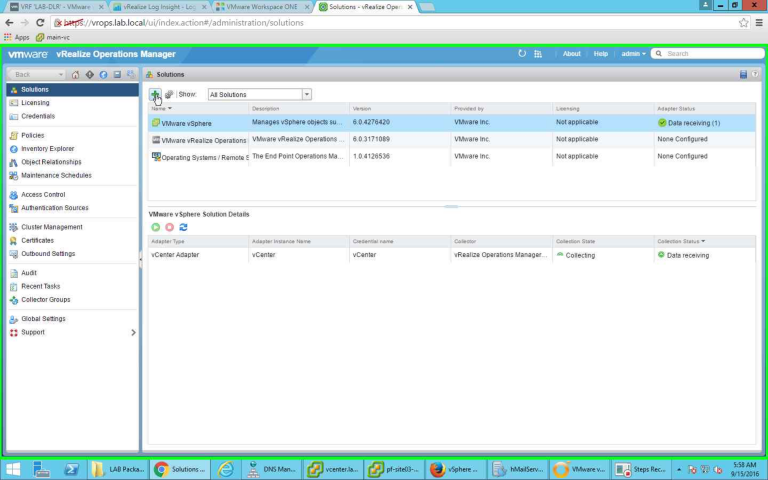
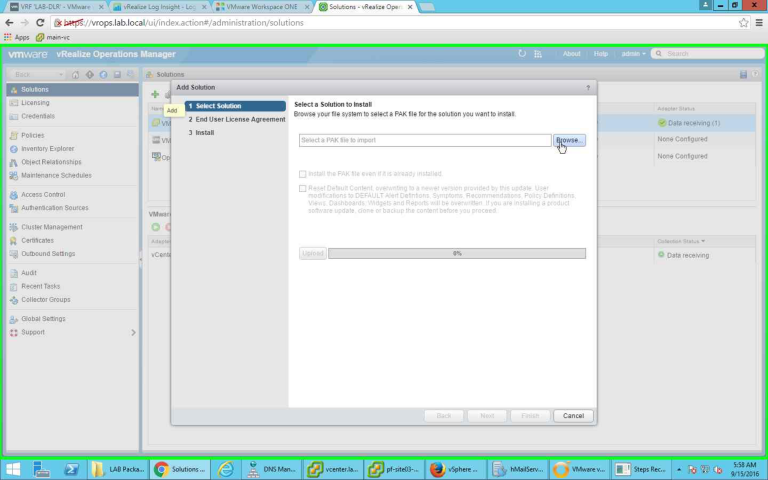
I have already logged into vROps environment using Admin account. For your use you can use any RBAC with admin rights. To start the installation Go to Administration-->Solutions, on the right side of the pace click on the green Plus sign to add the downloaded PAK file.
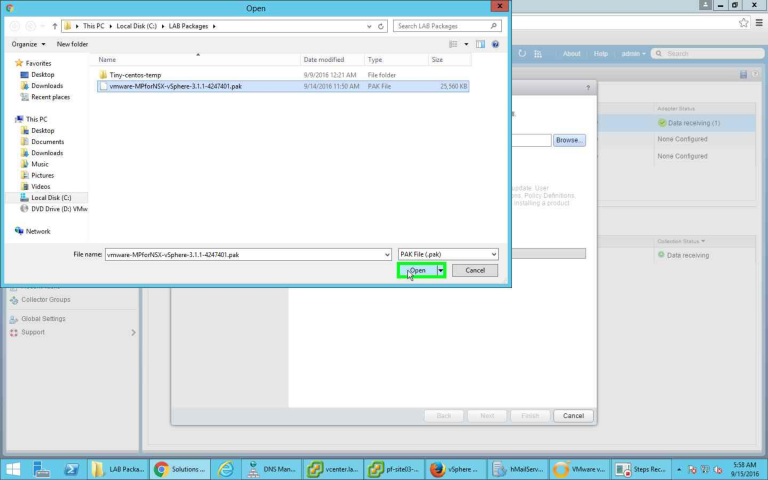
It will open up a new window to provide the details. Click on Browse button to browse for the file and select it.
Once selected, click on Open to use the file.
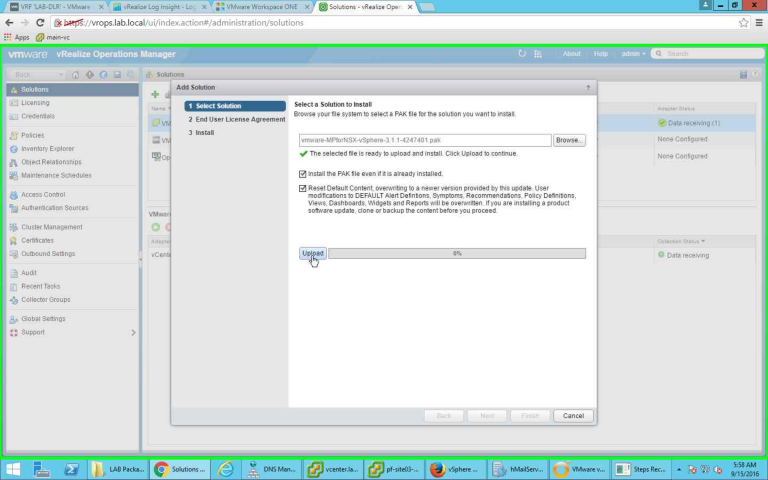
For my installation, though it was not installed earlier, still I have selected "Install the PAK file even if it is already installed". This will overwrite the earlier installation (if you have it).
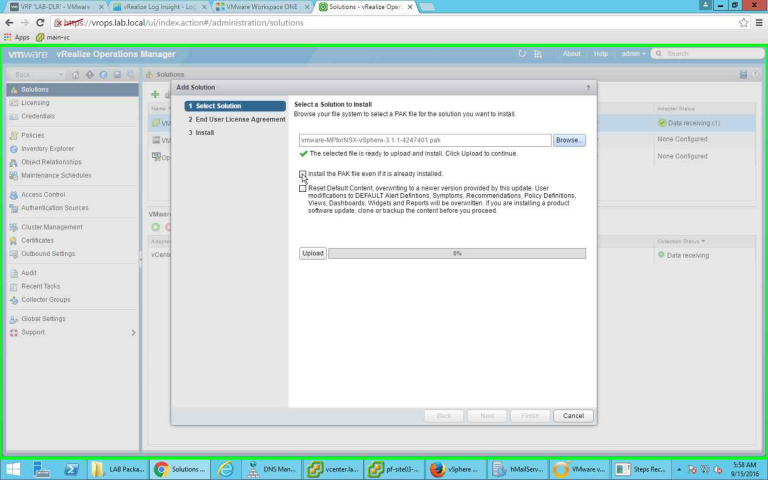
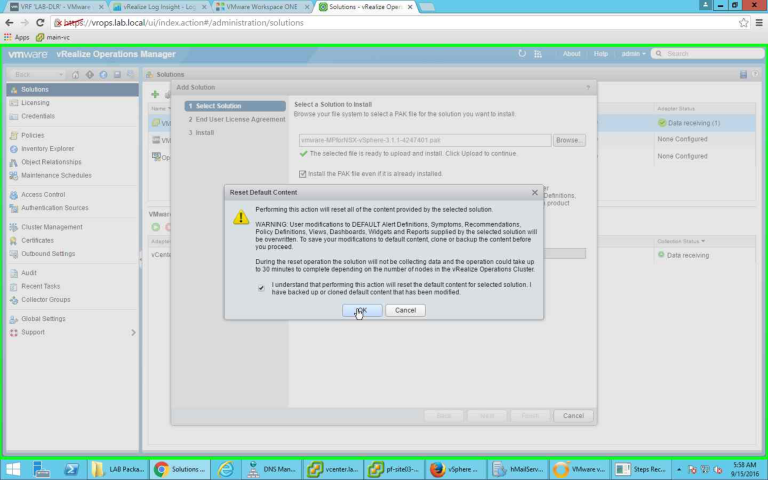
The second option will let you reset the Default content. If you select this option a POP UP windows will show you exact things it is going to do and you will need to select that you understand those option. Select the option and go ahead. Since this is my LAB environment and first time I am using this PAK so I had selected those option to check. Use as per your requirement in your environment.
Once done, click on Upload. It will upload the PAK file to the server.
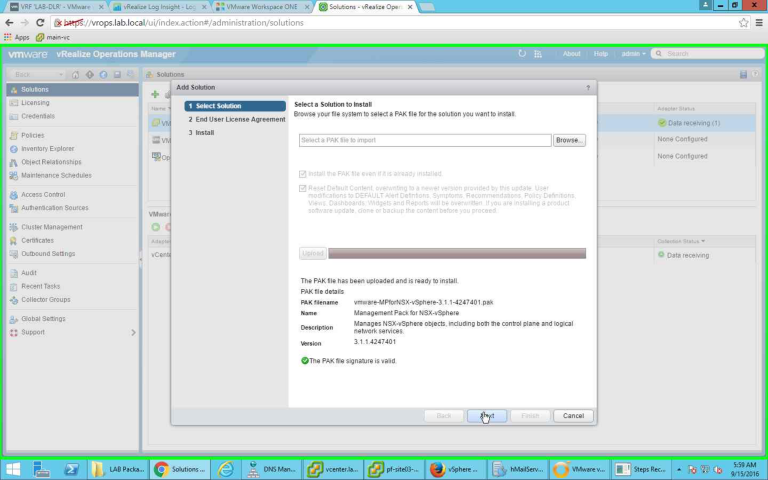
Once the upload is complete, it will check the signature of the PAK file and let you select the next option. Click next to go to the next screen.
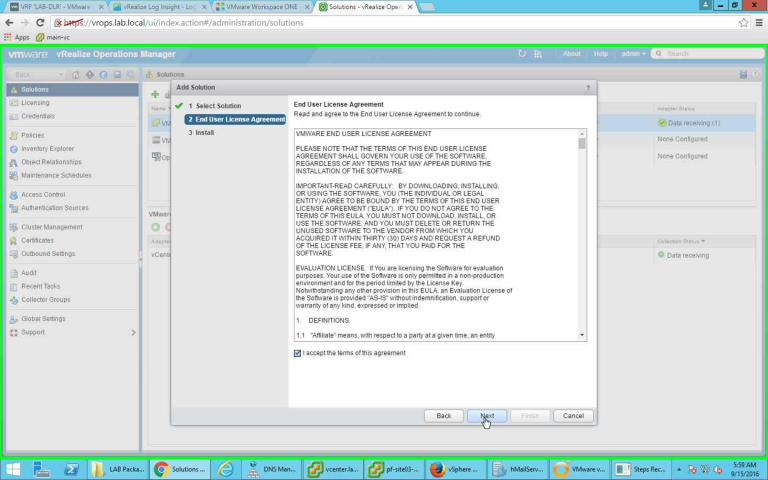
In the next screen you need to accept the license agreement. Select the agreement and click next.
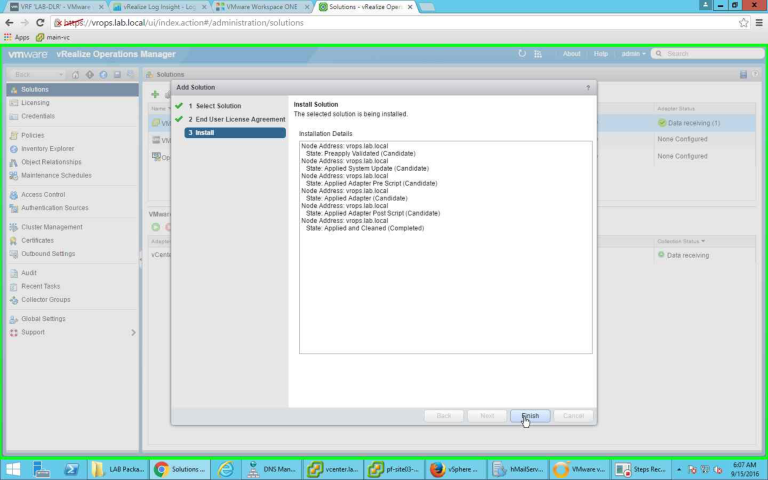
Clicking Next will start the installation. Wait till the installation is complete. Once the installation is done click on Finish to close the window.
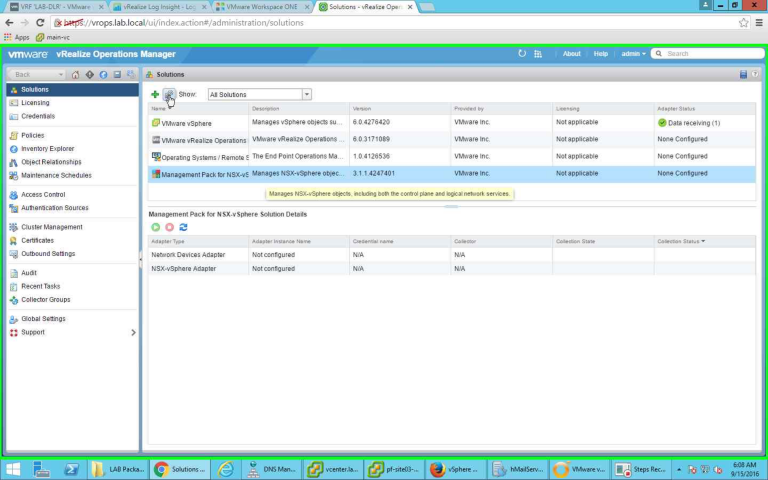
Now are pack in installed and ready for configuration. Let's configure the Solution now. Select the Solution and Click on the Gear button to configure it. Note, it lets you configure NSX-vSphere Adapter and other Network Devices Adapter. So using this Solution we have two adapters, one for NSX for vSphere and another for normal Network Devices. If you have any network device in your environment which you want to monitor you can do it from here. For now we will configure only the NSX-vSphere adapter.
Clicking on the Solution and selecting configure option will bring up a new window. Here you will be able to configure both the above mentioned adapters individually. Select NSX-vSphere Adapter to configure the same.
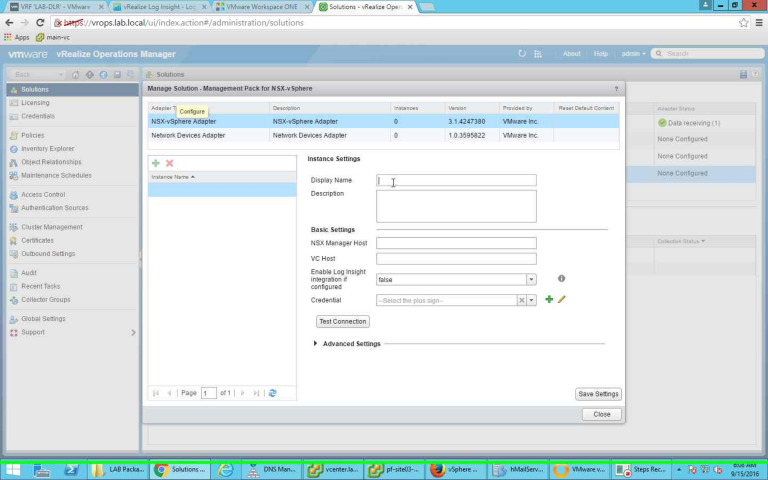
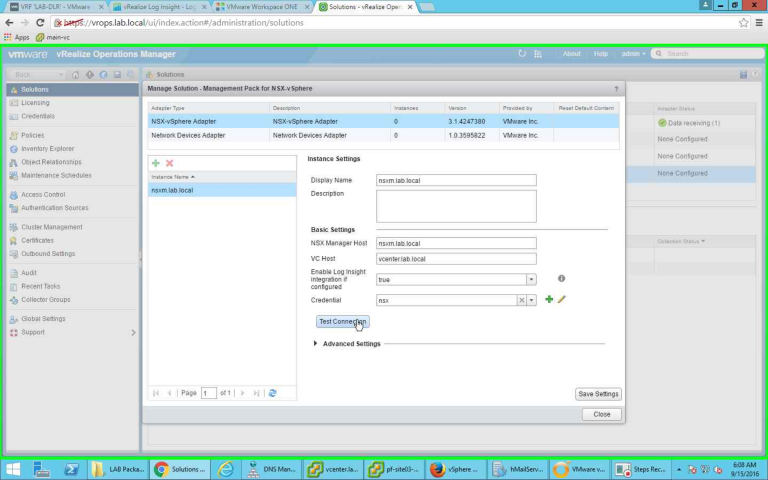
I provided the display name of the configuration, provided NSX Manager host name, vCenter host name (with which NSX Manager is attached). Also here I have the option to select whether I want Log Insight integration is needed or not. Since I have Log Insight configured in my environment and also have NSX plugin installed in Log Insight, so I am enabling Log Insight integration. The option to select that is available through a drop down option.
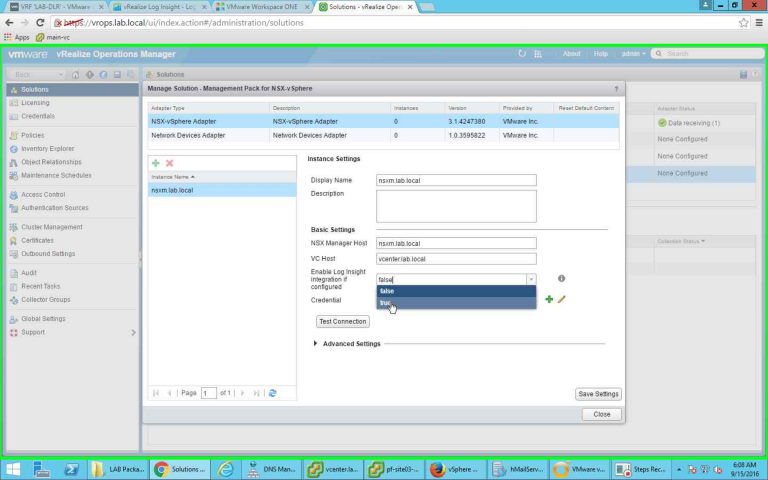
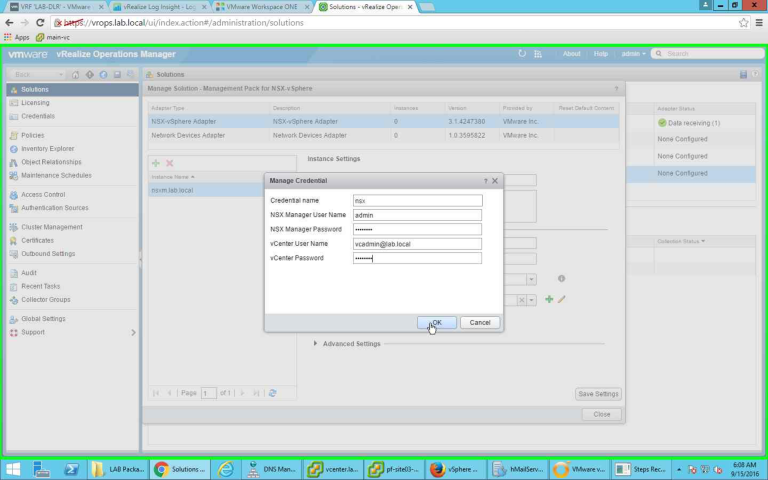
Once the above is done, then we need to provide Credential. Click on green Plus sign to create a new credential or use can use an existing one or modify one. For my environment, I am creating one. Here you need to provide credential for both NSX Manager and vCenter server. Once done click on OK to complete the step.
In the next step I want to test whether everything is working fine or not. So click on "Test Connection" to test whether vROps server can reach the endpoint.
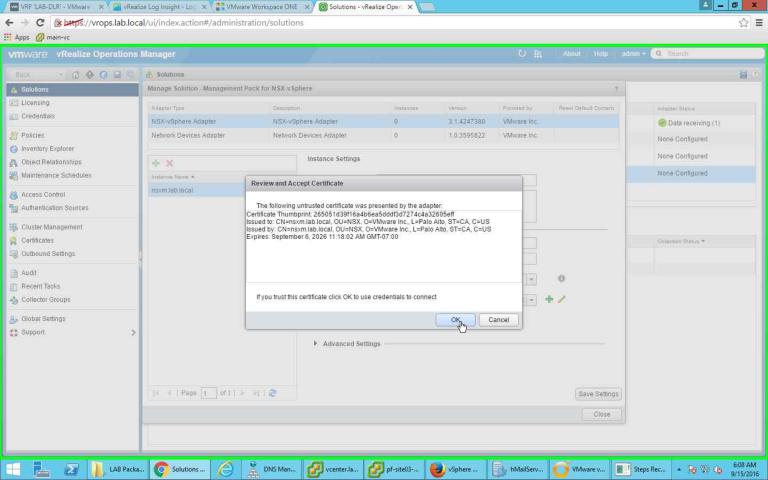
It will show you the certificate for NSX Manger. Click on OK to review and accept the certificate.
If everything was configured correctly, a small popup window will show you that the test was successful. Click on Ok to close the window.

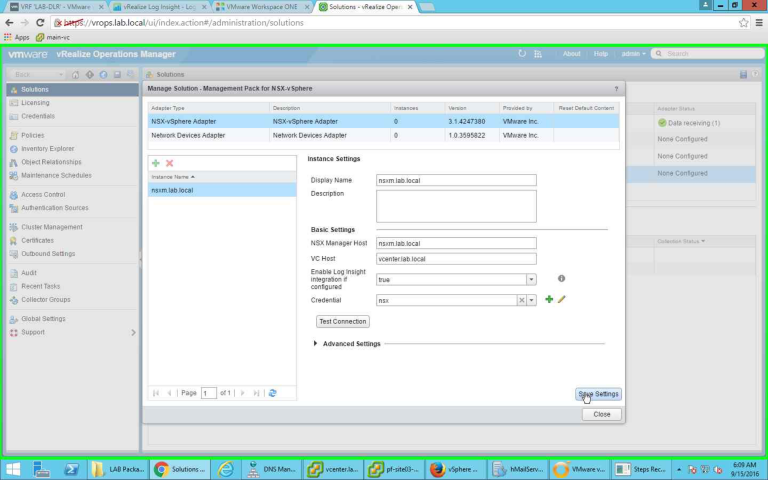
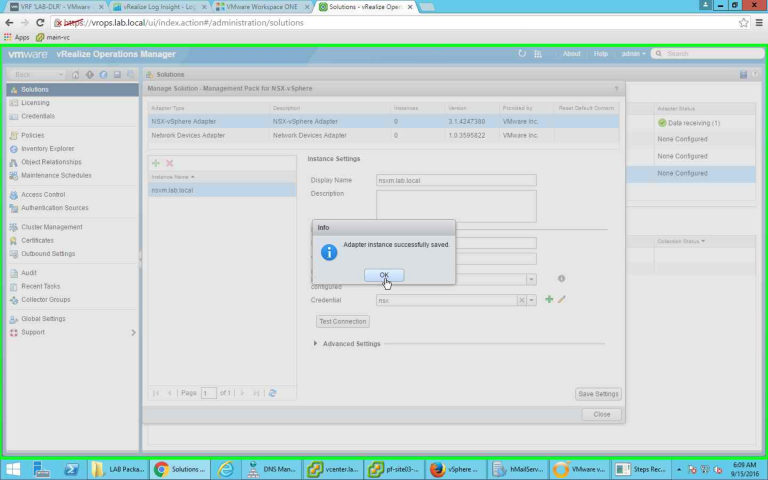
Click on "Save Settings" to save the settings.
A small POPUP window will let you know that the configuration for the Adapter Instance was successfully saved.
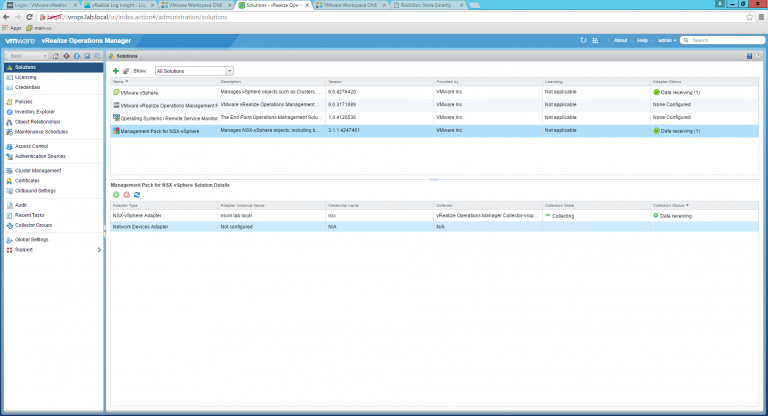
Now you should be able to see the adapter collection state as "Collecting" and Collection Status as "Data Receiving"
This concludes the Installation and Configuration part of NSX Management Pack for vRealize Operations. In the next part I will cover the informations and dashboards that this pack provides.