Purpose:
I work as a multi-cloud solution architect and as part of the job, often times, I give demos to customers or build specific use cases for them. While doing so I am always looking for an application which is lightweight, is useful (replicates real life use case) and uses 3-tier application architecture (most commonly used architecture).
I searched for such an application but could not find any, which, suits my requirement. So, I decided write one myself. This is the first version of the application. I will provide details of the application here and the required files are also provided here.
Fell free to use, make changes as necessary. Do let me know if you have questions or have modifications in mind.
Application Structure:
This is going to be a 3-tier application. With database as backend, app server as mid tier and web server as front tier.
Technology Used:
I used the following technologies for the application.
Database VM:
| Categories | Components |
|---|---|
| Operating System | Ubuntu Server |
| Access Method | REST API |
| Programming lang. | Python 3.x |
| Apps. | FastAPI, Uvicorn, Gunicorn, Nginx |
Application VM:
| Categories | Components |
|---|---|
| Operating System | Alpine Linux |
| Access Method | Web API |
| Programming lang. | Python 3.x |
| Apps. | Flask, HTML5+CSS+jQuery, Gunicorn |
Web VM:
| Categories | Components |
|---|---|
| Operating System | Alpine Linux |
| Access Method | Web API |
| Apps. | Nginx |
Reasoning:
Provided below are the reasons for choosing the technology components.
Platform:
| Tier | OS |
| Database | Ubuntu Server 22.04 (lts) |
| Application | Alpine Linux 3.17.1 |
| Web | Alpine Linux 3.17.1 |
Reasoning:
Overall I chose Alpine linux for all other component except database VM.
- MongoDB Support: Latest version of MongoDB (6.x) does not have a release for current Alpine version. Current version of Alpine linux is 3.17.x, whereas last available MongoDB version is 5.x on Alpine 3.9. Using older versions will force me to use older versions for all the other component. This is undesirable and increases complexity. Using Ubuntu as OS increased the overall footprint but gain outweighs the disadvantage here.
- Size of the VM: Alpine linux is much smaller in size in comparison with Ubuntu VM. This suits perfectly the app and the web vm's but for database vm we need more libraries. With all the libraries size becomes considerably larger for Alpine Linux. Hence Ubuntu was chosen as DB VM.
Detailed Structure:
Provided below are the detailed structure of the components.

How to:
Provided below are the details of the configuration. Since here I am providing all the program files, servers need to be configured as per detail below. I also plan to create a OVA file with everything pre-configured. That would not require the below configurations.
Database VM:
- I have included a sample database with 500 entries. The sample data was generated using Mockaroo.
- Database Name: employees_DB
- Collection Name: employees
- Structure:
- "_id": ObjectId
- "emp_id": int
- "first_name": str
- "last_name": str
- "email": str
- "ph_no": str
- "home_addr": str
- "st_addr": str
- "gender": str
- "job_type": str
- In the data structure, we will auto-generate
emp_idfield. This field is not modifiable by end users. It is created while adding a new record or deleted at the time of record deletion. - The combination or first_name and last_name is unique. Meaning, no two employees can have same first name and last name.
- Install MongoDB on the VM using the method detailed in the website.
- After installing MongoDB, create a folder where you want to keep all the required files. For example,
employee_db. - Download all the files under DB VM repository and copy it over to employee_db folder. The files under the DB VM repository are listed below:
- MOCK_DATA.json - contains the mock data
- app.py - Python file containing the application
- employee_database.py - Has the details on how to access the database and all the required functions to handle database operations.
- employee_models.py - This file defines the models for handling the data from the database. This aligns with the database collection schema.
- employee_routes.py - This file has all the routes for the application.
- requirements.txt - Has all the components needed to be installed for the application to be working.
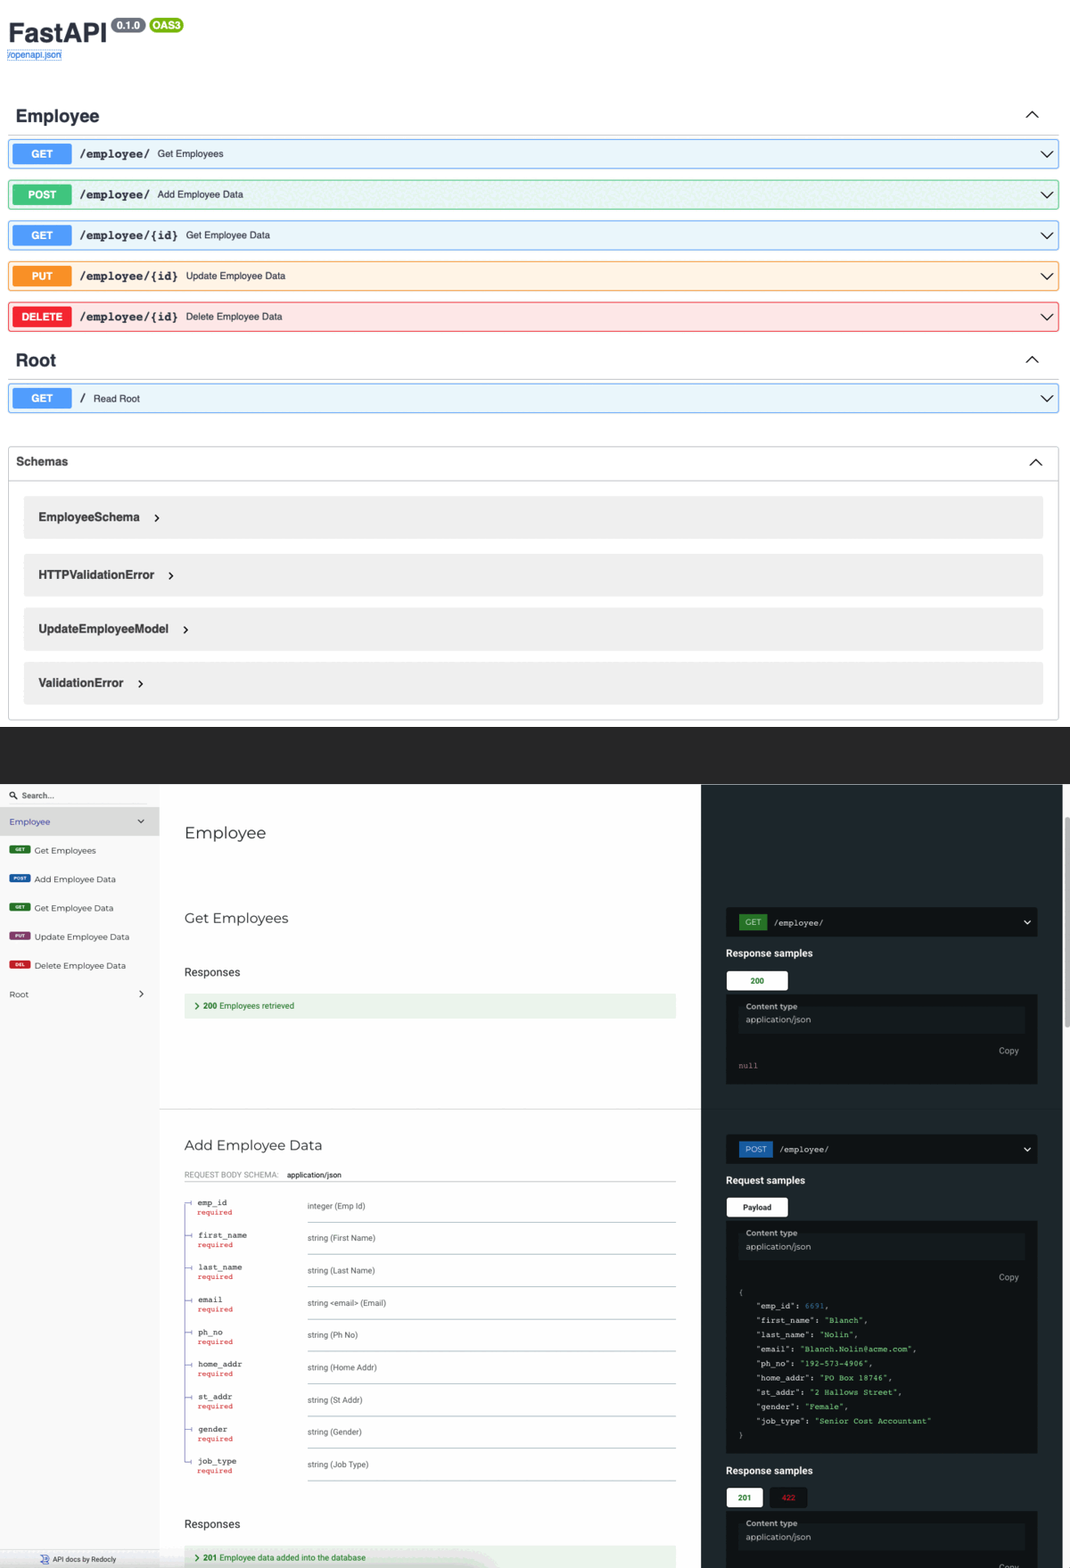
- fastapi - component which creates the REST API endpoints and Swagger UI
- uvicorn - Uvicorn is an ASGI web server implementation for Python
- pydantic[email] - Data validation and settings management using Python type annotations
- motor - Asynchronous python driver for MongoDB
- gunicorn - The Gunicorn "Green Unicorn" is a Python Web Server Gateway Interface HTTP server
- Supported CRUD operations:
GET /employee: to list all employees
GET /employee/<emp_id>: to get an employee by employee ID
POST /employee: to create a new employee record
PUT /employee/<emp_id>: to update an employee record by employee ID
DELETE /employee/<emp_id>: to delete an employee record by employee ID- Before we start the application we need to import the data into MongoDB database. From Ubuntu terminal go to the folder where you downloaded all the files (e.g. /home/user/employee_db) and run the following command:
- Next, we will set emp_id as unique and the combination of first_name and last_name as unique. So that we cannot have duplicates in these fields. For this we will log into mongsh from the terminal.
- Running NGINX+ GUNICORN + UVICORN in DB VM. Note, the following configurations assume you have an existing user by name "
user" present in the Ubuntu VM. Otherwise, replace it with your user id.
To update code:
Configure NGINIX:
Note: Change the user in /etc/nginx/nginx.conf from www-data to "user".
Application VM:
- Deploy an Alpine linux VM.
- Install the dependencies:
- Install flask:
- Install gunicorn
- Create a folder
/root/employee_app - Copy all the files including the structure inside
/root/employee_appfolder - Run gunicorn server as service in Alpine:
- Reboot the server. Now the application is available on http://<app-vm-ip>:8080
Web VM:
- Deploy an Alpine linux VM.
- Install Nginix:
- Configure Nginix as reverse proxy:
Now the application can be accessed by going to http://<web-server-ip or fqdn> Swagger UI is available for DB at http://<db-vm-ip or fqdn>/docs or http://<db-vm-ip or fqdn>/redoc
Sample Screenshots
Provided below are few sample screenshots.
Swagger UI and Redocs

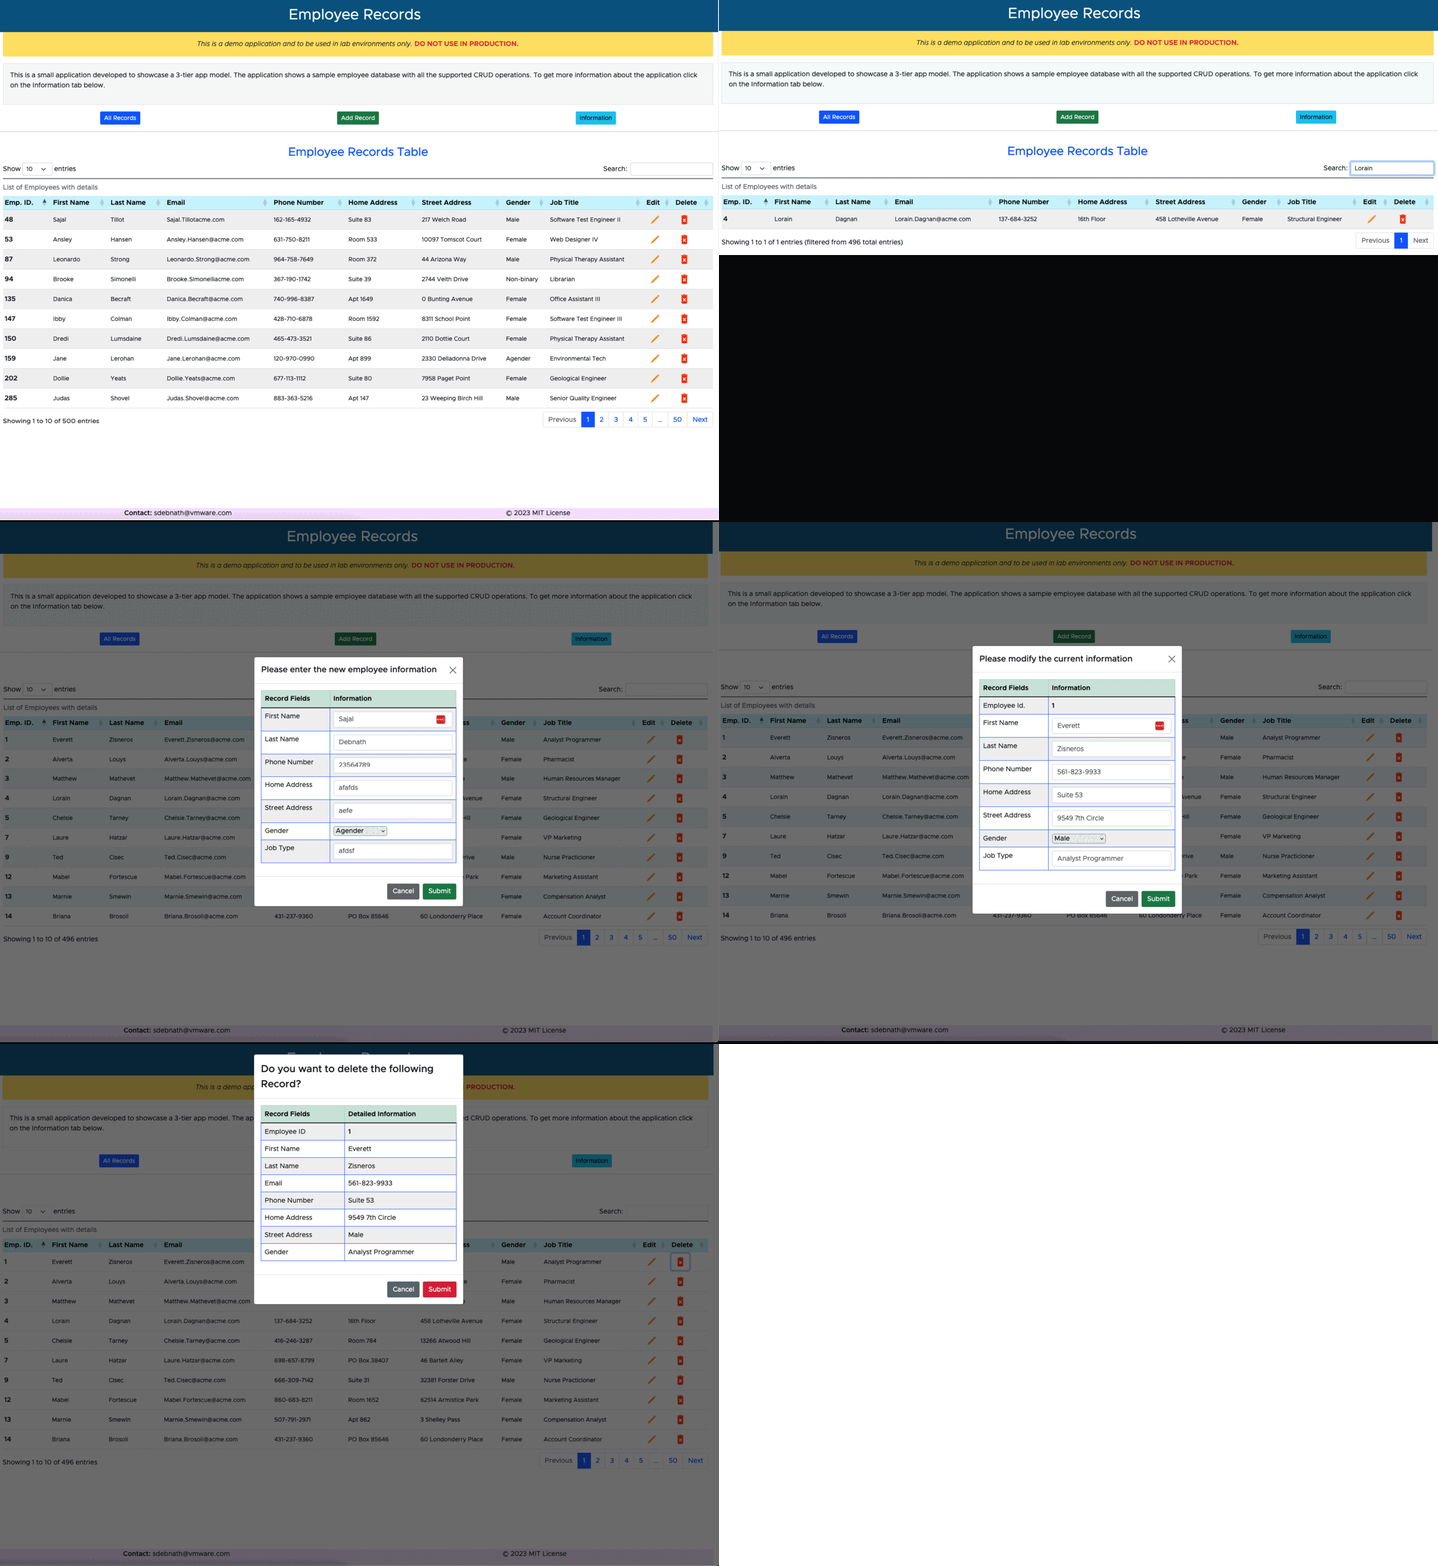
Application UI

The application UI is self explanatory. Explore the options and hope you will like it.
Get the application from Github repository